4 Stages Of Combat Handgun Retention
What are the four stages of combat handgun retention?
How would you handle someone bigger and stronger who got his hands on your weapon?
What if that person was a “no-shoot” subject?
The science of handgun retention provides training to deal with the various conditions in which either a combatant or a non-combatant attempts to get their hands on your sidearm – a “gun grab” in street parlance. This can occur before, during or after it’s out of your holster.
The worst scenario is when you attempt to draw your handgun in a justifiable defensive shooting situation and out of the clear blue sky comes a pair of hands clamping down on your gun. Now you have a life-threatening circumstance and can’t bring your weapon into play. As terrifying as that concept may be, one must be prepared to handle that probability, especially in today’s prevailing climate of aggressive criminal behavior.
The most common reaction to being startled or shocked is to freeze. The knees bend and the center of gravity lowers slightly as the head moves forward. This is commonly referred to in the law enforcement training community as the classic “Frozen Foot Syndrome.”
Recall a time when you were scared out of your wits suddenly by a loud, unexpected crash in your immediate vicinity. Odds are your primal response was most likely – even though it may have been only for a split second – frozen feet.
Aside from the initial shock of surprise, there are four distinct stages of combat handgun retention. Before discussing actual weapon-retention techniques, your best defense against a gun grab always begins with a rock-solid shooting platform. Your shooting platform should be stable. Whether you shoot from an Isosceles or Weaver, the key is that your feet should be planted solidly and your base strong and well-balanced for shot placement.
The second defense to a gun grab is your grip. The handgun should be gripped firmly with full contact of the entire palm and fingers wrapped around the frame or stocks, with the web of the shooting hand firmly pressing up against the tang as close as possible to the bore line.
This accomplishes two basic objectives: It allows a well-placed shot, and you’ve got enough tension in your grip to execute a combat handgun-retention maneuver in a contact engagement.
Non-Contact
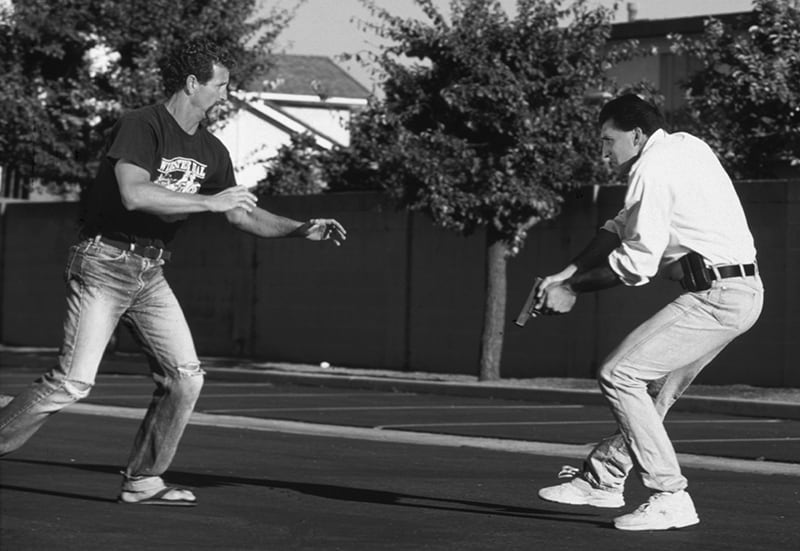
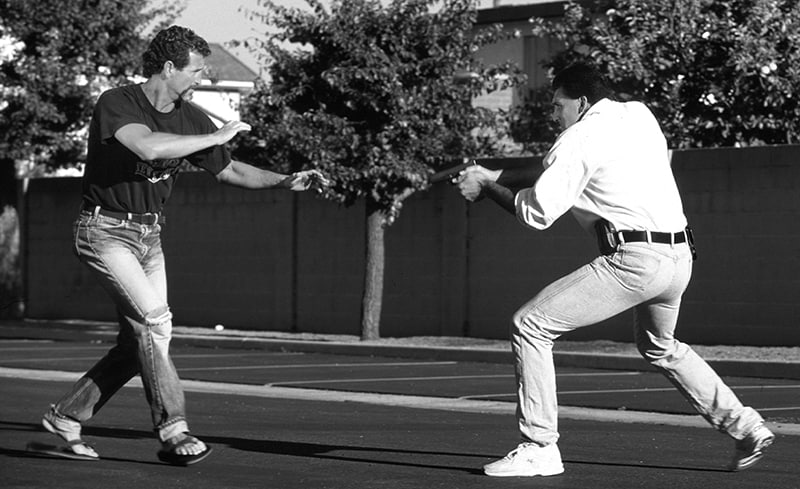
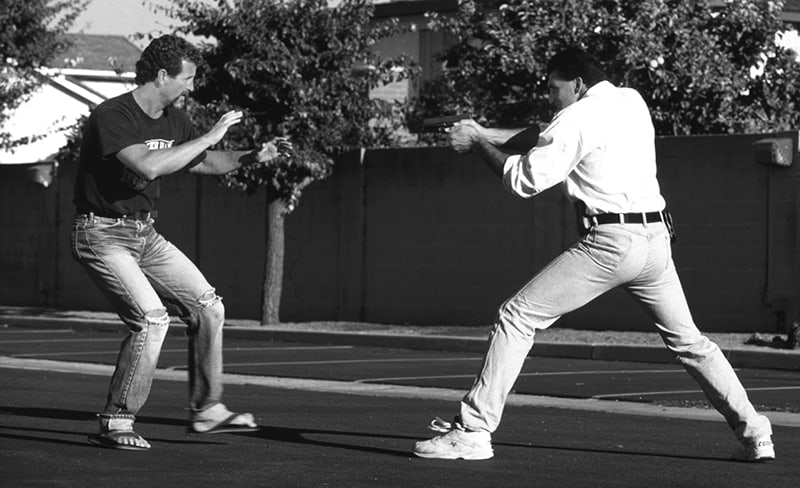
A non-contact engagement takes place when you have your handgun drawn to the guard or on target and you observe someone approaching your muzzle with the intention to wrestle your handgun away from you. However, there is no physical contact made, and you have plenty of time to get away.
There are several solutions to solving a non-contact engagement. Since there is distance between you and your would-be gun grabber as well as no physical contact, you are free to move your body and arms. The best movement is down and away from your attacker’s hands and 45 degrees to your strong side.
The most common mistake people make in the face of a frontal attack is to move straight backward. This is a highly ineffective technique in that someone who is running forward always has the advantage over someone who is running in reverse. Your best option is to step off the line of attack on a 45-degree angle. This will force your opponent to turn and reface your position, which buys you time and opportunity to reassume a strong shooting stance.
The time you gained by moving away from the line of attack also allows you to assess additional data input from your internal Combat Information Center, such as the identification of your attacker. What if it’s your baby daughter yelling “Daddy, what’s going on!” and she wasn’t grabbing for your gun, but for the safety of your arms? A definite no-shoot subject, and you’re grateful that you took the time to train for a non-contact engagement.
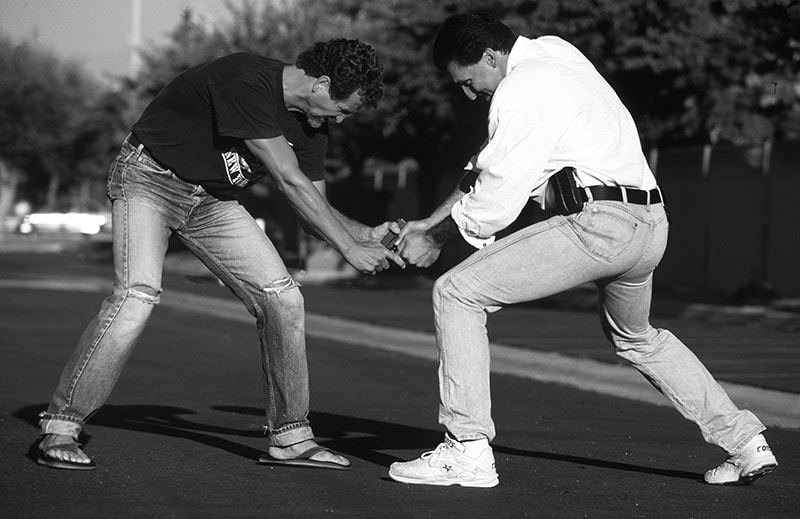
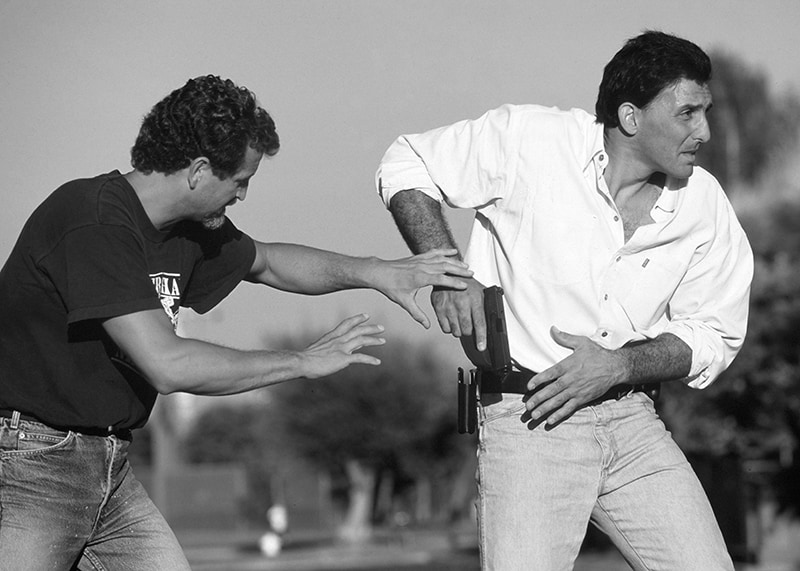
Contact
A contact engagement takes place when someone has actually made physical contact with your drawn handgun with the intention of wrestling it away from your hands. There are only two conditions and three positions of study in this, the second stage of combat handgun retention.
The first condition is that your opponent is successful in achieving a singlehanded grab on your handgun. The second condition is that your opponent has successfully gained a two-handed secured grip on your handgun.
Fortunately, solutions to the two-handed grab are the same as the single-handed grab, but may require a bit more effort to execute.
The first position in which your opponent can obtain a single or two-handed grip is to the starboard, or ejection-port side, in the case of a semiauto. The second position is a port-side grab. The final and most startling is dead center, right up front and personal, with either one or two hands vice-gripped to the barrel or slide of your handgun.
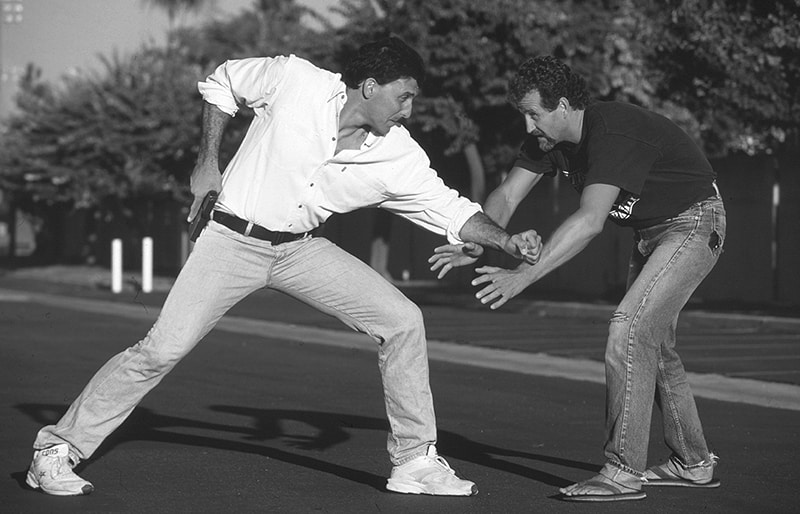
For either a port or starboard side grab from either a single or two-handed, maintain your strong shooting platform and solid grip. Now, pivot your upper body in the opposite direction of the grab while pulling the handgun down in a half-moon motion. This sudden movement will violently yank at your attacker’s grip, and he will be attempting to use the small muscles in his thumbs and fingers to hold up your entire body’s weight. The solution for both port and starboard side positions is the same, and it requires very little training to master these half-moon, gross motor skills.
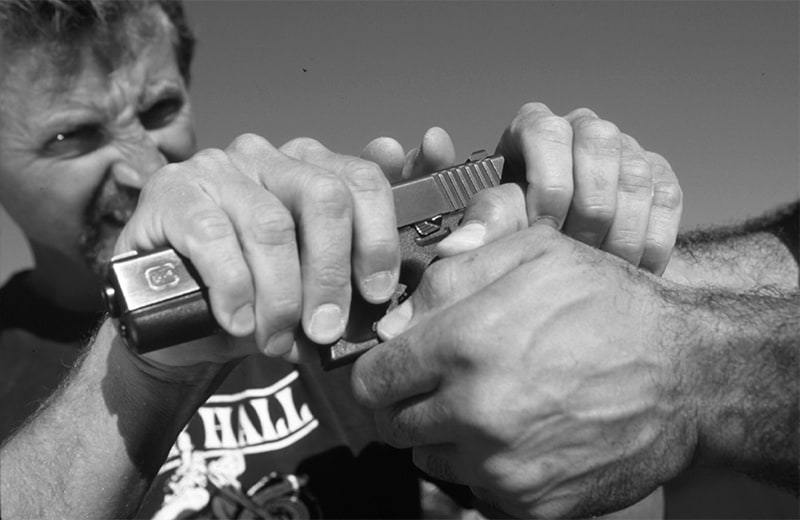
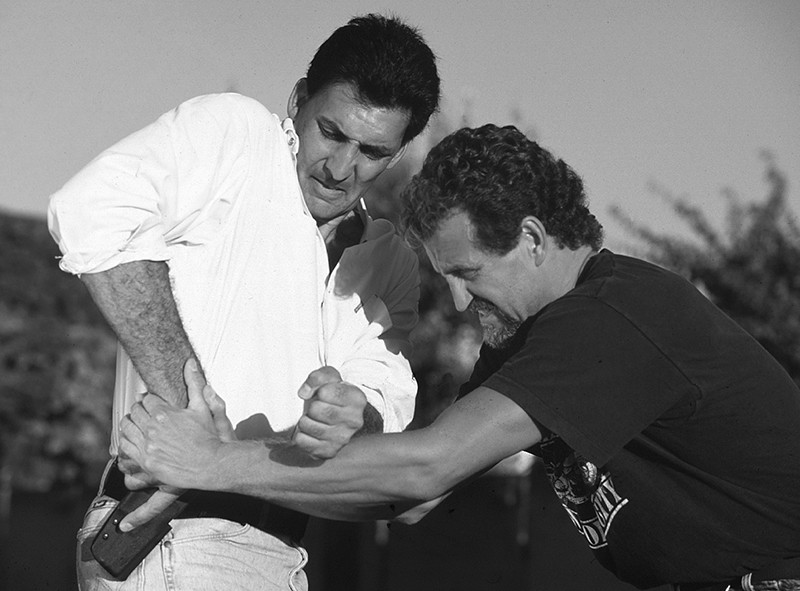
The third and ugliest of the three contact engagement positions is dead-on your centerline, right in front of the muzzle. If he is a shootable subject and your particular weapon is not immobilized by his grip – in some cases, certain handguns may fail to fire, like if a 1911 slide is bumped out of battery – then simply execute a full trigger press. The best weapon retention technique, the one that works 100 percent of the time, is to simply shoot the bastard off the end of your gun.
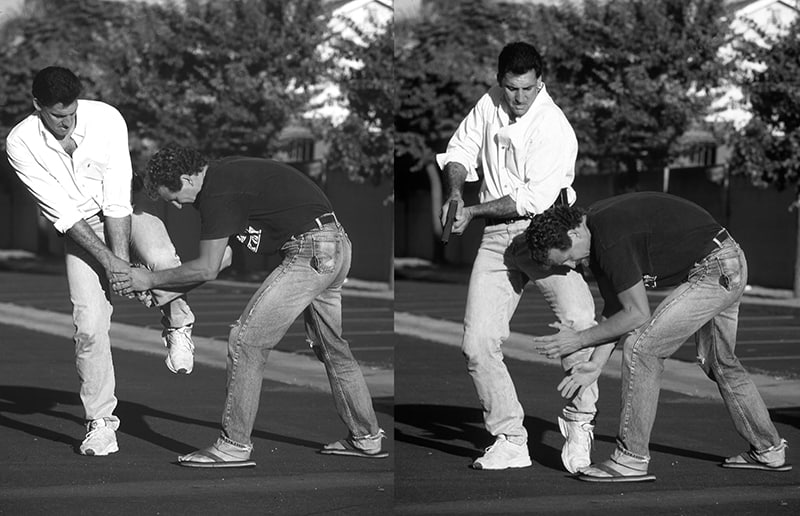
If shooting the person is not an option, you’ve got a couple of failsafe alternatives. The first is what is called “Step Back and Kneel” (SBK). Simply step back and kneel on one knee while jerking back violently with your gun. This sudden rearward movement and change in elevation will violently yank at your attacker’s grip, and he will be attempting to use the small muscles in his thumbs and fingers to hold up your entire body’s weight.
Another technique is what is known as the “Knee Escape.” This is used if the assailant is pushing straight down on your muzzle, toward the ground forcefully with both hands. Maintain your strong grip and good shooting platform. Next, take the knee closest to your attacker, raise it up near your elbow and slide it quickly down the side your forearm, as if scratching a mosquito bite with the inside of your knee. Slide your knee past your grip and to the slide, slamming into his wrist as you pull up with both your hands. Be very careful not to cover your own knee with your muzzle.
At the conclusion of both the SBK and knee escape techniques, it is highly recommended to again step off 45 degrees to the line of attack to ensure that the assailant does not regain his grip on your handgun.
Presentation
A presentation engagement occurs right when you are smack in mid draw. Your handgun is neither fully drawn nor seated firmly in your holster. You are caught somewhere in between. This is the weakest link in the chain of drawing your handgun into the guard or up on target.
There are only two directions you can go from here– either you slam the gun back into the holster, something an attacker really wouldn’t expect, and pivot your body away, again using your legs against his hands or you continue your draw stroke into one of the half-moons as previously described. Your retention response will be determined by his attack position: starboard, port or muzzle.
Holstered
A holstered engagement is the most common for police, and it occurs when your weapon is still in the holster and someone is trying to claw it out. You may or may not have your own hand on your gun at this stage.
If you have your hands on your gun and your gun is in the holster, you want to keep it there. Most likely, his hands are grabbing on top of your hands, and all that is necessary is to pivot your body away on a 45-degree angle of movement while maintaining pressure on your gun.
The other scenario is that he has his hands on your gun and it is still in the holster. Your best move is to slam both your hands on top of his and violently jerk your body down and away, pivoting 45 degrees, back and away from your attacker.
Regardless of your solution, be sure not to fall into the old “running backwards technique.” Someone running forward will eventually overcome someone running backwards.
These techniques and training positions are designed in a logical manner so as to facilitate training in combat handgun retention. Stages one through four should be practiced in that order of progression, so as to develop muscle memory response in order of effectiveness based on position.
The secret to reactive response is practice – practice with reality. The number of repetitions you do in training will equal how well you perform under pressure.
It is highly suggested that you practice these techniques with a training partner using an inert or “red gun.” Be sure that your partner is wearing thick leather gloves and you are careful not to rip your training partner’s thumbs and fingers off his hand during training. These techniques have been proven in the field, and with a little practice, your odds on handling a combat handgun-retention situation increase dramatically.

Sign up for the Personal Defense newsletter here: