DIY Fixes: Troubleshooting Your AR

You might have the best-running AR ever that is tuned to perfection,
but what will you do if it starts malfunctioning?
If your AR-15 stops working, or works sporadically, it’s likely to be one of three root causes: it’s dirty, it’s beat, it’s got a leak. Details are coming.
Now, if it’s a new gun, function problems can be more tedious to solve. That’s because a freshly-constructed firearm has the potential for a slew of quality issues—build quality and parts quality. Not all are tested prior to shipment as they should be either. Problem with a new gun? Take it back where you got it.
Let’s focus on a previously ginning AR-15 that’s decided to go on operational vacation. I’ll be talking about cycling issues. If you pull the trigger and nothing expected happens, then, son, you got a broken part somewhere, and the fix for it is plainly to replace the part.
Since AR-15’s are semi-automatic in function, there are two essential operational errors. Failure to feed, failure to eject. Both of those together are a failure to cycle.
About the only shooter-supplied change creating function issues is ammunition. There are differences in available ammo, especially if we’re comparing commercial to Mil-spec. The handloader needs to do some double-checking on case sizing, and possibly some rethinking on propellant charge or choice.
Even though this may not be perfectly agreeable, given supplies and expenses, it’s best to run the same (known-to-work) ammo all the time, if, of course, the ammo is doing the job you’ve called on it to do. If ammo changed, the plainly easiest way to determine if it caused the problem is to try a few rounds of what it replaced.
I’ve talked around the horn a few times on this next, but cyclic failures are not always due to “light” loads. Not nearly. If you’ve either knowingly or innocently switched to a brand of ammo loaded to a higher pressure, what some call “overfunction” can fool us by its symptoms. Depending on the pressure levels of the before and after load, and depending on the rifle’s previous system suitability to function with the lighter load, introducing extra gas into the system can create excessive carrier velocity upon unlocking after firing, which can ultimately lead to excessively rapid return to battery. The carrier can outrun the magazine spring, in effect, and fail to chamber the next cartridge. Solutions for this require employing some means to slow carrier unlocking. I’ve addressed this before, but an adjustable gas flow system, a stouter buffer spring, or adding weight to the carrier can do the job.
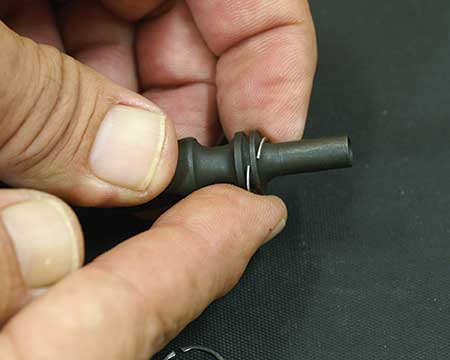
Gas rings don’t last forever and a broken one, or well-worn set, can let too much gas slip by.
Replacement is easy and Glen thinks such should be part of anyone’s maintenance plan.

Here’s a new key. Staking can be done with a hammer and a prick punch, but likely means it won’t
result in a showroom-finish-quality job. As long as metal is displaced inward from the key to secure
the screw heads from rotating it will be functional.
If a spent case won’t eject, reduced gas flow or grit and grime top our suspect list. Could also be a broken extractor spring, or broken ejector spring. When either of these fails, they usually break, not just weaken.
Often a previously reliable rifle commences short-stroking. That’s when the carrier doesn’t get kicked far enough to the rear to pick up a cartridge from the magazine to chamber the round, or far enough to allow the bolt stop to engage and lock back the bolt. The cause for this is either not enough “flow” from the gas system (a leak) or too much operational friction (grit and grime).
If I suspect reduced gas flow, my first check is for a loose bolt carrier key. If it’s loose, then there will be your leak. Installed correctly, it should not loosen. Installed incorrectly, it probably will loosen. I have seen a slew of incorrectly installed keys.
The key is secured by two screws with knurled heads. Most specs call for 30 to 40 inch-pounds of torque, but I say that’s not enough. They need to be tighter than that. Most of the better builders I know don’t even use a torque wrench for this op. They just turn them down tight—good and tight.
However, tight is not, by itself, enough. The last few new AR-15’s I’ve seen weren’t staked. There’s a trend toward using high-strength threadlocker (glue) in lieu of staking. Wrong. If the screws are not staked, the screws are not going to stay put. That’s that.
The area inside the bolt carrier where the tail end of the bolt fits will get caked with carbon. That fouling is tough to remove because it’s tough to reach. After this recess gets coated with carbon residue, the bolt gets “sticky.” There’s a specialty scraper-type tool I prefer, but GM Top Engine Cleaner (get it from Mr. Goodwrench, which is the parts counter at a Chevy dealer) and some brushing can dissolve the majority. This is a stout chemical.
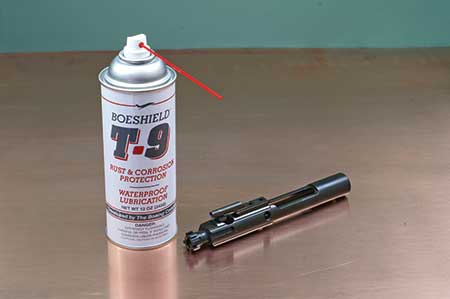
Keep everything clean and lubed. Glen likes this stuff, but there are a number of good lubes.
What matters is your maintenance plan includes continual cleaning, lubing, cleaning and so on.
“Fresh” lube works better.
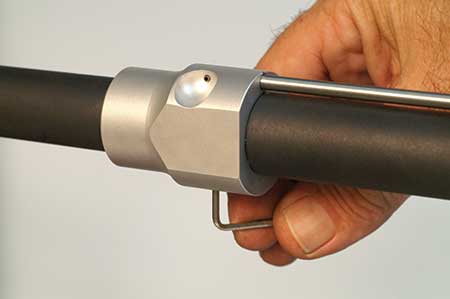
A gas manifold should be seated flush and snug (top). Standard-duty thread locker on the set
screw is a good idea, but don’t risk heavy-duty gluing the manifold to the barrel.
It’s known AR-15’s tend to develop function problems around the 2,500-round mark. Two likely reasons, aforementioned dirt if this area has been neglected that long, or the buffer spring. A conventional music wire spring lasts only 2,500 rounds. Replace it, and (better beyond belief) replace it with a chrome silicon or 17-7ph stainless spring. Then you’ll never have to think about it again.
The gas rings on the bolt won’t last forever. A break creates a leak, meaning gas is dissipated away from functional utility. Here’s an easy fix. Keep spares. A one-piece-design aftermarket ring normally holds up better.
Another area creating unwanted permeation of propellant gas can be the gas manifold (the apparatus the gas tube fits into on the barrel), especially when there’s an aftermarket gas block installed. Fit issues are common enough when there are incongruencies between block inside diameter and corresponding barrel area exterior dimension. It doesn’t take much gap to provide an outlet for gas under the sort of pressure we’re dealing with. You can usually see the blow-by firing the rifle from the hip, or look for dark streaks.
If you suspect this is a permeation point, make sure the block retaining screws are tight. Threadlocker on the screws helps keep them that way. I do not recommend applying any such glue to the manifold/barrel contact because there’s a risk of the glue getting into the gas port, which is a sure way to cap the flow.
Last, for this little ditty, but decidedly not the least, is keep the daggone rifle clean and lubricated. Clean the chamber! This area is often neglected in rifles with otherwise meticulously maintained bores. Thread a .357-caliber pistol brush on a short rod and scrub the chamber walls each barrel cleaning. Keep the bolt carrier assembly well lubricated (bolt body, cam pin, carrier body) and keep changing the oil: lube it, shoot it, clean it, lube it, shoot it.
Shameless Plug
This material was specially adapted from The Competitive AR-15: Builder’s Guide, available from Zediker Publishing.
Visit ZedikerPublishing.com and BuyZedikerBooks.com for more.