5 Tips To Better Shooting
Hitting with a handgun is simple in theory. In practice? Not so much …
How to shoot accurately is simple to explain. In reality there are only two things necessary: (1) Stabilize the muzzle in the proper perspective to the target, and (2) release the shot without affecting stability. Of course in some circumstances you may have to take into account distance, atmospheric conditions and other influences that affect the flight of the projectile on its way to the target.
As simple as this sounds, it is difficult for most people to do consistently. “Easier said than done” comes to mind. For this article we’ll concentrate on handguns. But the drills, exercises and techniques transfer directly to all single-projectile long guns.
This article is slanted toward marksmanship development. Tactics, while important, do little if you can’t hit the target. Whether it’s competition, combat, personal defense, recreational shooting or otherwise, the ability to hit the target is paramount.
One of the most valuable natural attributes you have is eye/hand coordination. Wherever your eyes look, your hands follow and fingers point. This natural ability helps to orient the muzzle of the firearm toward the target.
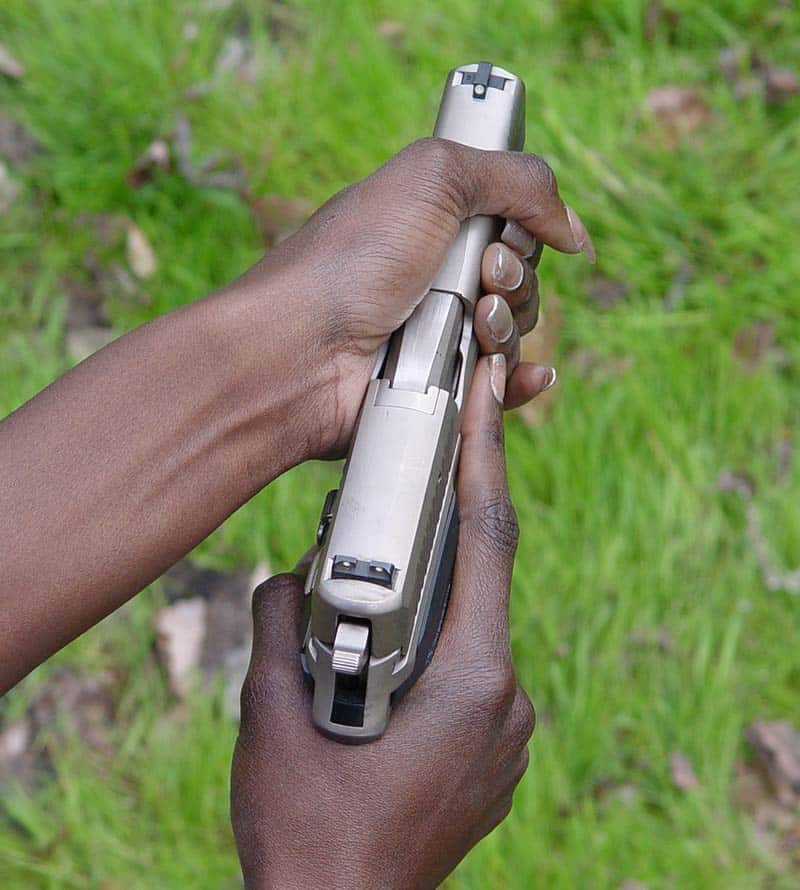
One of the first steps is positioning the pistol in the web of the dominant hand, coordinating the
muzzle with the shooter’s natural ability to point at an object through hand/eye coordination.
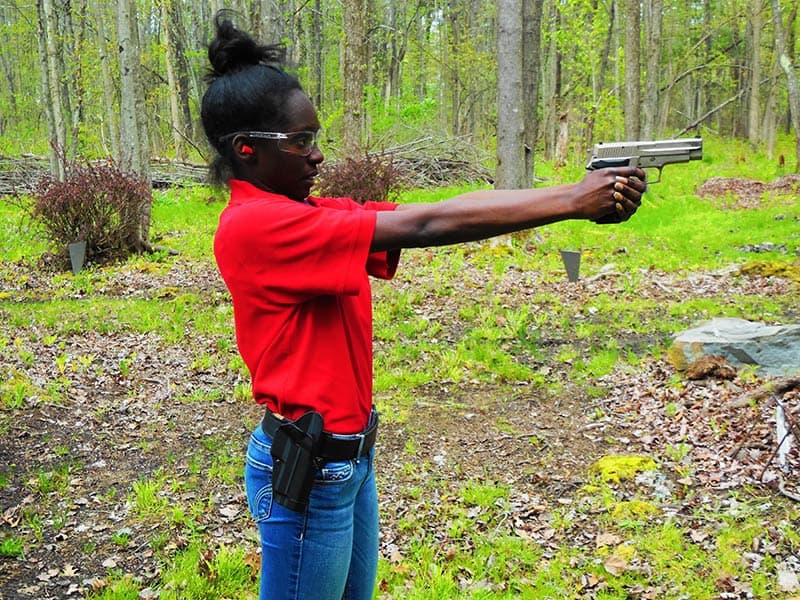
This college senior is learning to shoot in preparation for her career with a federal agency.
1. Gun Fit
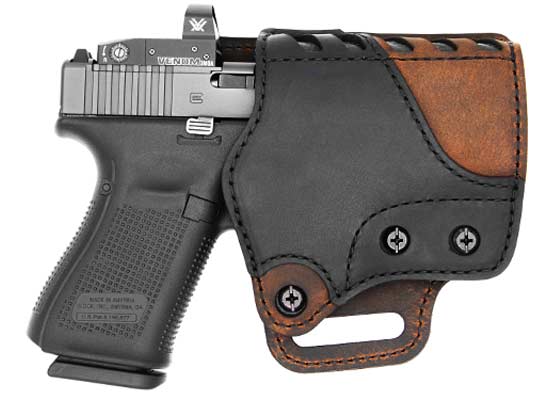
The fit of the handgun helps refine the position of the muzzle in relation to the target. When gripping a handgun in the web of your hand aligned with the extended thumb and index finger, the gun tends to have its muzzle pointing much like an index finger. It is an ideal fit when the muzzle points where the index finger points.
Unfortunately, one other factor must be considered — trigger reach. This is the ability of your index finger to achieve full contact across the face of the trigger without compromising the position of the gun’s grip in the web of your hand. Then you can pull the trigger in line with the frame of the gun, with little to no added movement to the muzzle.
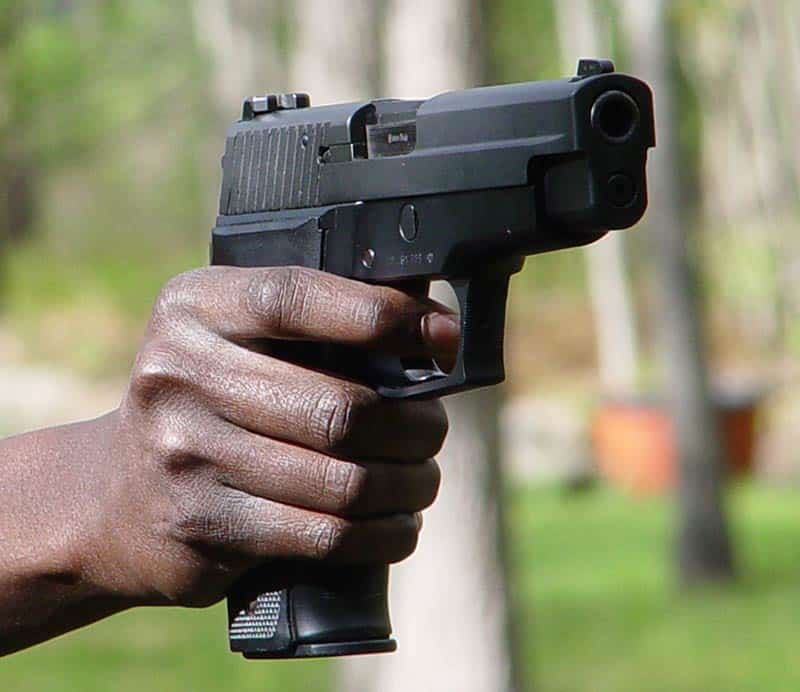
This shows good finger placement to enable moving the trigger without adding movement to the muzzle.
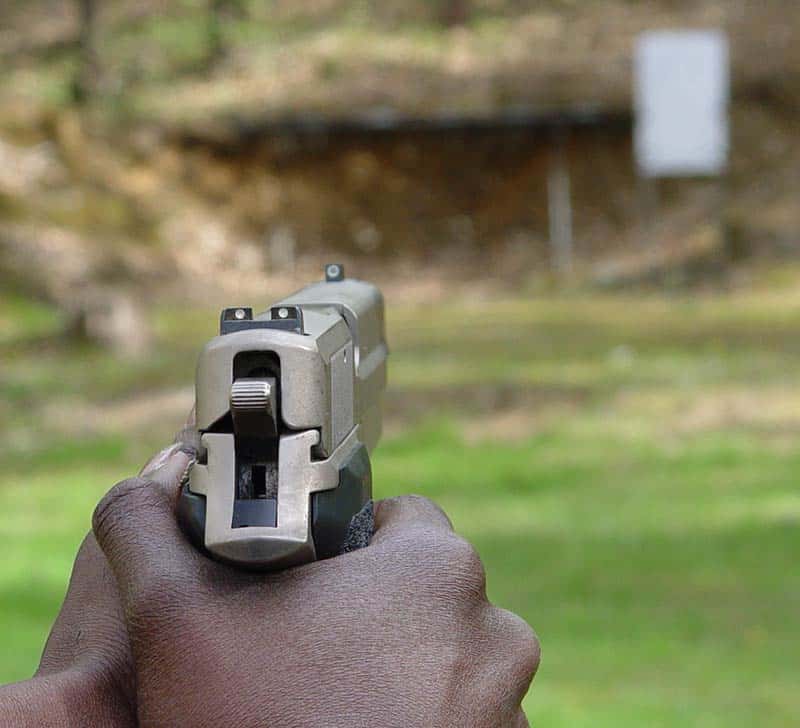
Here, the shooter is preparing to float the dot of the front sight in the center of
her target as she releases the shot for a center hit.
2. Float The Dot, Shoot The Shot
Conventional teaches us to focus on the front sight, ensuring you see equal amounts of light (or space) on either side of the front sight as viewed through the rear sight notch with the top of the front sight and the rear sight on the same plane. This involves three separate dimensions to keep track of on just the sight alone, never mind the target you’re trying to hit! Sight alignment by itself can be complicated if you let it.
Of course in order to get the muzzle oriented to the target, you must position the aligned sights on the desired point of impact. This in itself provides another dimension of difficulty — trying to see if the sights are where you think they are on the target, which draws your eye focus away from the front sight.
Having your focus shift back and forth from sights to target further complicates the firing process by making you reluctant to pull the trigger until sights and target seem perfectly positioned, which rarely — if ever — occurs. This can cause you to jerk the trigger, causing you to miss.
To simplify matters, you can use a technique capitalizing on the eye’s natural ability to find the center of objects in space. It is beneficial to have an easy-to-see dot on the front sight. It should be positioned below the top of the front sight so it can be seen easily through the rear sight notch when the top of the front sight and rear are in alignment.
By focusing on the dot through the rear sight, your eye automatically positions the sights in the desired relationship to put the muzzle on the target. Simply focusing on the dot and letting your eyes do what comes naturally eliminates the need to keep checking both sides and the top of the front sight to ensure proper alignment. You’ll naturally center the dot in the rear sight notch and keep it centered.
In addition, by superimposing the dot on the center of the target (much like you’d do with a reflex or red dot sight), your eyes not only center the dot in the rear sight notch, but also centers it on the target which will result in a hit in the desired location.
One benefit of the dot is less apparent movement of the gun in relation to the target. But rest assured, the gun is unlikely to be motionless. The dot will appear to be floating like the numbered ping pong ball used in the daily lottery drawing, floating gently on a bed of air. Hence the phrase: Float the Dot and Shoot the Shot.

A shallow “V” combined with a big-dot front sight is quicker, but perhaps not as precise at longer distances.
3. Pulling The Trigger
The trigger is the gas pedal of the gun. Move it like you would to smoothly accelerate and accelerate. Smooth, fluid motion without creating additional movement to the muzzle is the objective. Did you notice speed wasn’t part of the equation? You can manipulate the trigger as fast or as slow as needed as long as the muzzle remains stable on target. For best results in the beginning, control the trigger in both directions by maintaining trigger contact with the index finger throughout the entire shot delivery process. This may become less important as your proficiency increases, but it’s a good place to start.
A pet peeve of mine is using the word “squeeze” in referencing trigger pull. Squeeze suggests compression of an object with the whole hand which induces movement to the muzzle as pressure is increased, as opposed to the independent movement of a single digit.
Another term I don’t care for is “press.” It suggests movement being made or pressure being applied forward — or away — from the hand such as pressing the button on an elevator to change floors. “Pull” is the term I like to use, for it is an apt description of what is taking place and something easy for the shooter to visualize.
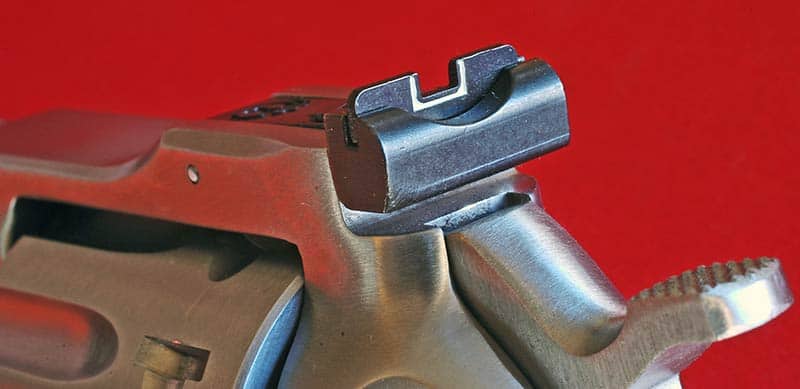
Sight options: The traditional square-notch rear sight is one of three elements
the shooter must deal with in maintaining the correct sight picture.

The Advantage Tactical Dark Diamond Sight provides yet another
solution to the problem of simplifying sight acquisition.
4. Merging Sight Focus And Trigger Pull
Using the sights properly takes a lot of concentration by itself. When you factor in pulling the trigger while maintaining muzzle stability, it can be overwhelming. A simpler and easier way to maintain concentration on both elements simultaneously is to merge the two — visually and mentally — into a single act.
Envision a connection between the front sight and the trigger where the trigger movement “pulls” the front sight toward the eye, through the rear sight notch, maintaining alignment until the shot. This technique blends the two most important parts of accurate shot delivery and ensures follow-through — keeping the muzzle on the target until the bullet has left.

For advanced shooters, getting the right grasp can be done with a
holstered pistol to begin the draw stroke.
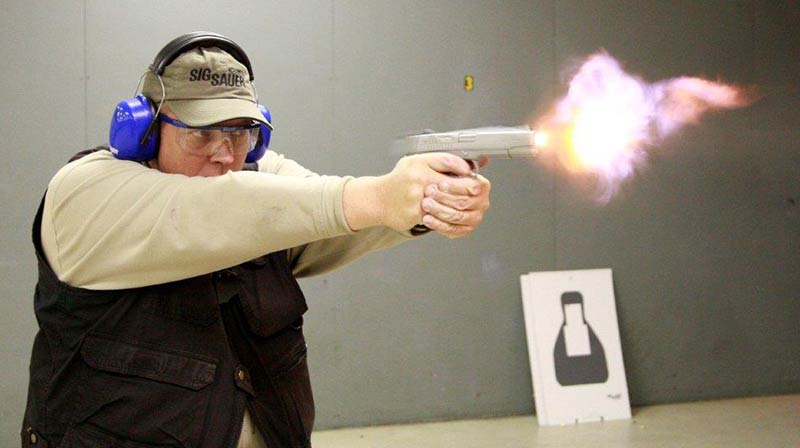
The shooter’s eyes are open to see the smoke and flash just in front of the front sight
as the bullet exits the muzzle. This validates follow-through and makes “calling the shot” possible.
5. Follow-Through
Many shooters have difficulty in “calling their shot.” This refers to the ability to determine where your shot hit before actually verifying it. This isn’t hard to do if your eyes are open and you’re still focusing on the sights when you fire.
A simple way to verify what your eyes were doing at the moment of discharge is by recognizing a few visual cues that take place every time the gun discharges. An effective way to tell if your eyes are open — but not necessarily focused on the sights — is by your peripheral awareness of what’s taking place between the front and rear sight every time you fire.
In nearly every semi-automatic firearm the fired cartridge is ejected to one side or another. Your eyes are automatically attracted to the movement of the ejected round which tells you they were open if you catch a glimpse of the cartridge case as it is ejected. On a revolver, recognition of the flash and smoke at the barrel/cylinder gap will accomplish the same thing.
The most beneficial visual cue is the atmospheric disturbance caused by the smoke, flash and blast immediately after the bullet exits the muzzle. On a handgun, the front sight is well within the cone of the visible gases that follow the bullet out. If your eyes are open and focused on the front sight, these gases will be seen as a disturbance around the front sight an instant after the bullet exits.
Final Thoughts
Shooting can be a complicated process if we allow it to be. Simplifying it by understanding how to perform the clean and consistent execution of the foundational skills will serve the purpose for the great majority of shooters.
Without the foundational skills firmly in place, all the glamour and glitz of the “high-speed, low-drag” techniques are of little use if you’re not hitting the target.
Personal Defense 2017 Cover