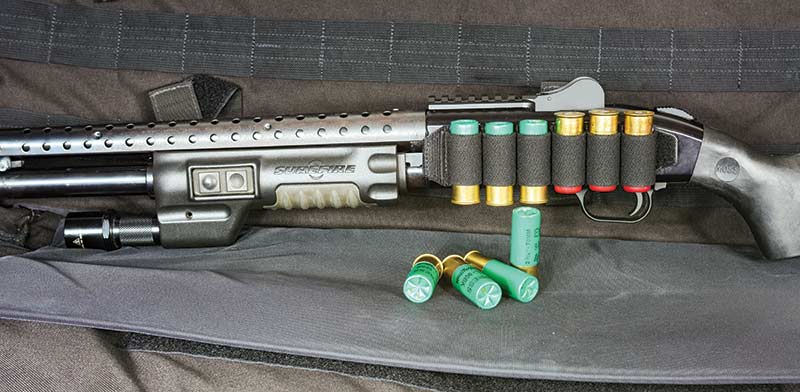
Second Chance Shotgun
Rebuilding A Beloved Mossberg 500 Cruiser
Jeremy’s beloved Mossberg 500 was nearly reduced to scrap
after being shot with corrosive ammo and accidentally left to rust.
Fortunately, it’s back to fighting trim and with a few improvements!
I have a certain moral weakness that when I find something reliable, I simply trust it to do its job and sometimes overlook routine maintenance. I hadn’t completely done this with the Mossberg 500 Cruiser I relied on for the better part of 25+ years but I did neglect to clean it regularly. No worries: The gun kept working.
In 60+ years of production with over 11 million produced, the 500 is the most-produced shotgun of all time, and mine has certainly shown why. It just worked and rocked on for a couple of decades until I used it to test some all-brass shotshells I loaded with black powder substitute. Having missed the memo those powders are also corrosive, I put the 500 in the safe and was surprised to find it a few weeks later with red rust growing in the barrel, bolt and everything steel that looked important.
Stripping it down confirmed most action parts were seriously rusted and the bore almost completely darkened. Fortunately, breaking the 500 down for repair provided the opportunity to make some other improvements I’d been thinking about. We’ll start with the mandatory, then follow up with the improvements, most of which were provided by tactical-shotgun pioneer Vang Comp.
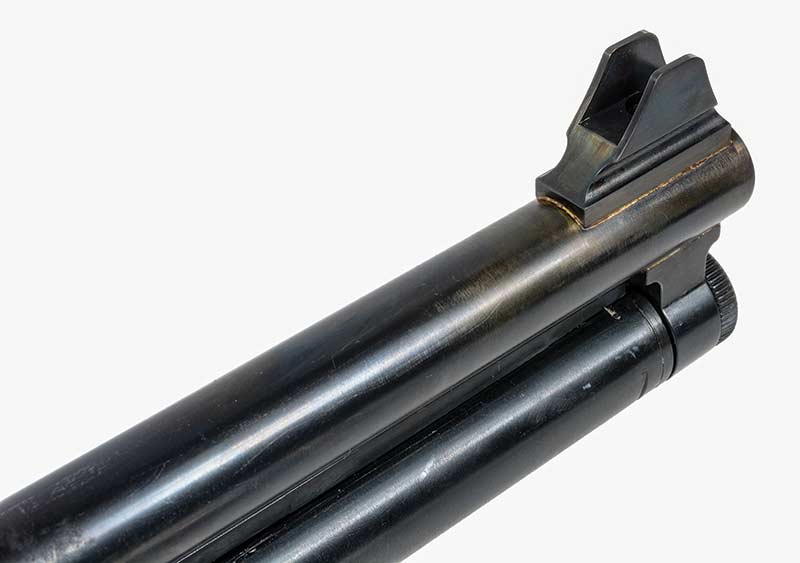
The front sight base in place after soldering and its first coat of cold blue.
It will get more to obtain a more-consistent black finish.
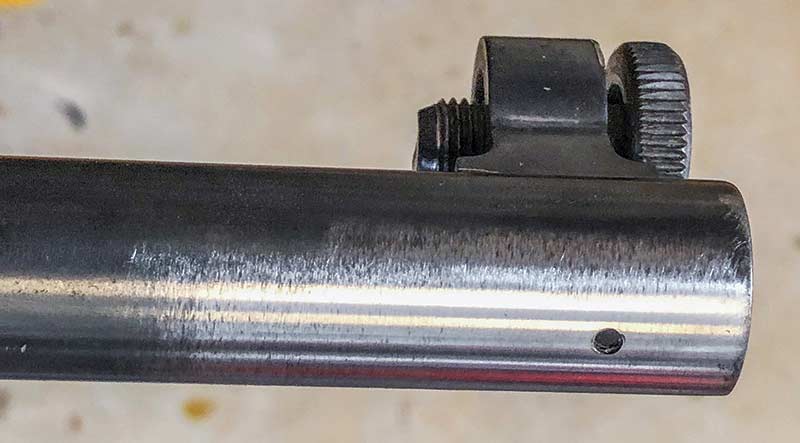
After removing the front sight, shoeshine the barrel with 320-grit
sandpaper to prepare it for soldering on the front sight.
Takedown
To disassemble the 500, make sure it’s clear then loosen the nut beneath the barrel, pull the barrel forward and out of the receiver. There’s only one dimpled pin going all the way through the receiver, the one holding the trigger assembly in place. The other round items are pivot points for internal parts. Drive out the trigger housing pin, then remove the housing by tilting it down at the rear. Forcing it out otherwise is likely to break part of the plastic housing and give you the opportunity to find a replacement on eBay.
The cartridge stop and interrupter ride in slots on either side of the receiver and they’ll probably fall out after the trigger housing is removed. If not, gently lift them out. The ends of the twin action-bars on the back of the pump fit into notches in the sides of the bolt slide. This sits beneath the bolt and forces the pivoting bolt lock (pinned in place within in the bolt) up into the locking slot in the barrel.
Like an AR, the bolt locks to the barrel, not the aluminum receiver. The slide runs in a set of captured grooves with clearance for removal at the rear part of its travel. Move the pump back until the slide lines up with this area and lift it out, then squeeze in the legs of the elevator to free the studs on either end. The pump comes forward off the mag tube. The bolt can then be removed from the front of the receiver and the spring steel ejector unscrewed through the ejection port.
Unscrew the mag tube — probably with a strap wrench — to remove the spring and follower. Do not clamp the tube in a vise, as it risks crimping the tube. The spring will make a sideways break for freedom as soon as the tube comes out and the follower may join it.
Restoring the action parts is basic remedial work — detailed disassembly followed by bead-blasting. A bead blaster and air compressor stout enough to run it can be a heavy investment, so having it done professionally or purchasing new replacement parts might be more cost-effective.
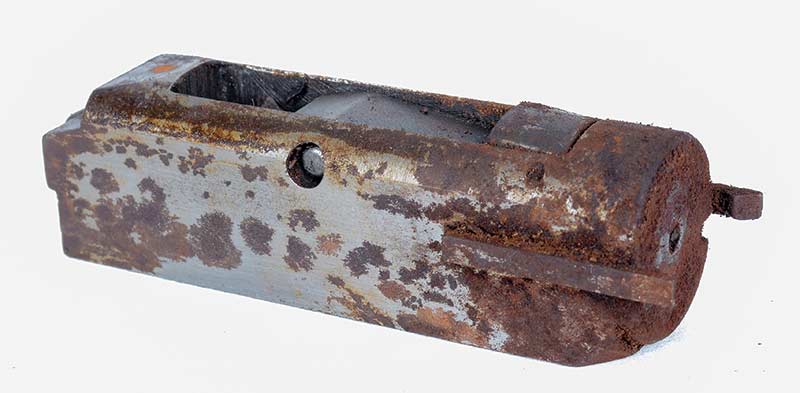
Corrosive powder left most of the steel parts of the gun thickly coated with red rust.
This was a valuable — and expensive — lesson in taking care of your guns!
The action parts after bluing are ready to be reinstalled ). Some of the pits were
simply too deep to safely remove, so some pitting is still visible even with the new bluing.
Pit Removal
The visible portions of the bolt and elevator on the 500 are left bright instead of blued, which is attractive but rusted particularly badly. After blasting them both with 800-grit media, deep pits remained. I used 220 sandpaper backed by a file to polish the pits away from the bolt, using crosshatch and lengthwise strokes to keep the surface even, then re-blasted. You should never polish a flat with unsupported sandpaper as it creates a wavy surface.
The problem with polishing out pits is the entire surface has to be brought down to keep a true surface. There’s enough mass in the bolt I had no compunction shaving it down a bit, but the elevator was too thin to risk thinning it further. The pits remain — an unsightly lesson in taking care of your stuff.
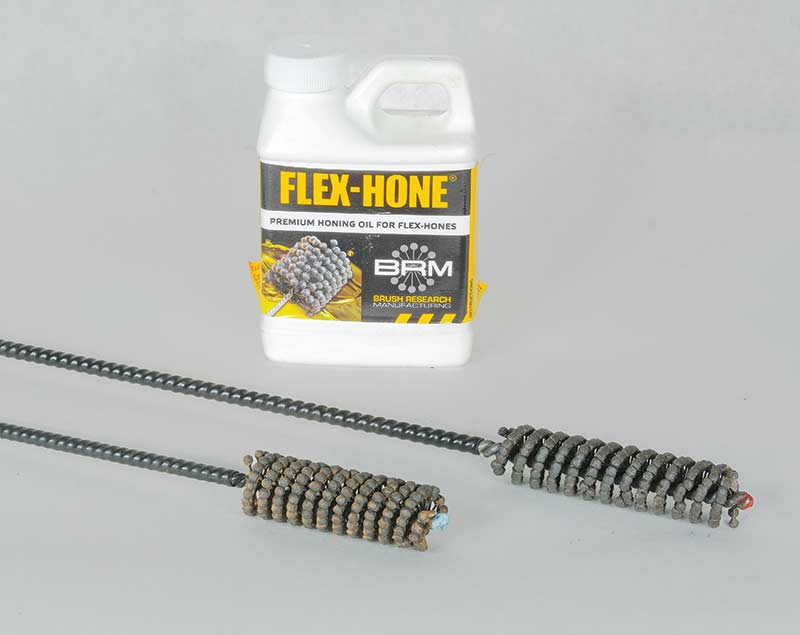
Jeremy used a set of barrel hones from Brownells to remove as much
of the pitting as possible. They must be used with the proprietary Flex Hone oil.
Barrel Treatment
Similar with the barrel as all pits could not safely be removed. To recondition it, I used three Flex Hone barrel hones by Brownells: medium (180-grit) for the bore followed by fine (800) for the barrel and chamber. They must be used with the included honing oil to create an abrasive slurry inside the barrel and keep the hone from being damaged.
Chuck it into a drill and cover well with oil. The wise man will also put something around the muzzle end of the barrel. While you shouldn’t run the hone all the way out of the barrel, it will come part-way out. When it does, grey slurry will spray all over the place.
Run the hone smoothly back and forth, supporting the flexible shaft to keep it running true and check frequently.
Candidly, the pitting in this barrel was so bad it’s an open question whether I will be able to keep it from rusting. Time will tell if it has to be replaced. I did the final hone after installing ghost ring sights by Vang Comp.
The front sight jigged up and ready for the oxyacetylene torch.
The receiver was spotted using a 3/32" ball end mill for the sight
base holes then tapped #8-40. This is an uncommon size but
easy to find on Amazon.
Front Sight Swap
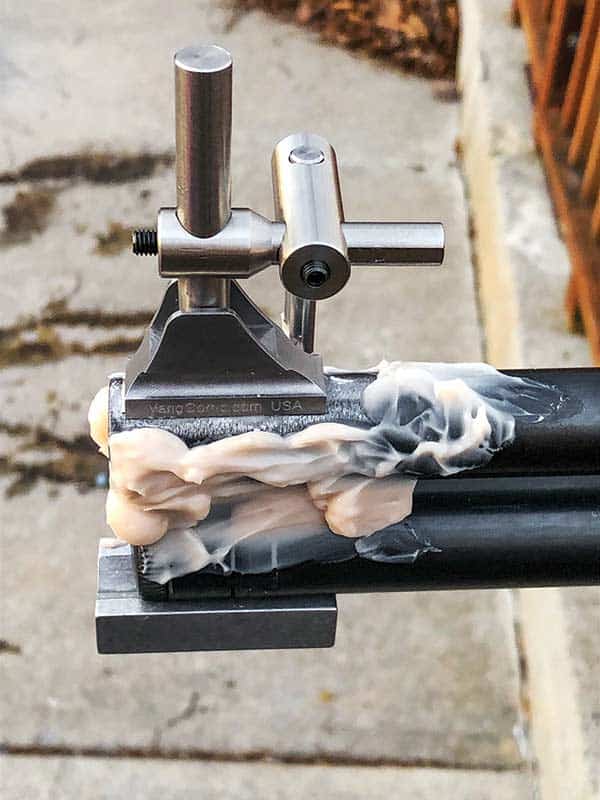
The front sight, which comes in the white (unfinished), must be silver soldered to the barrel — a bit of a tricky operation considering the similarly mounted lug on the bottom of the barrel directly beneath it. Too little heat and the sight won’t stay, too much and you lose the lug. Way too much and you melt the barrel.
The factory heat shield slides on from the front and cannot be removed with the factory front bead in place. With this in mind, I kept the heat shield on when installing the Vang sight. The first step is always material prep, so after removing the factory front bead, I scuffed the bluing off with 320-grit paper using a shoeshine motion to get down to bare steel.
I used Brownells Silvaloy 355 silver solder, which comes in both round wire and ½” wide strips (the choice for this task), as well as their ramp-soldering jig. The fixture has a grooved base and adjustable armature with a spring-loaded contact piece to keep the sight from moving as the solder flows. While I attempted to follow the instructions of scribing a line to align the sight correctly, it did not work for me. I installed the barrel in the gun, fully bolted into the mag tube and clamped the sight in place after looking down the receiver to align it.
To protect the barrel, especially the crucial lower lug, I surrounded the area with Bloc-It heat-absorbing paste and fired up the oxyacetylene torch to heat the barrel and sight base — but mostly the base — alternately until the solder flowed. Afterward, a touch-up with cold blue before screwing in the AR-style front sight blade.
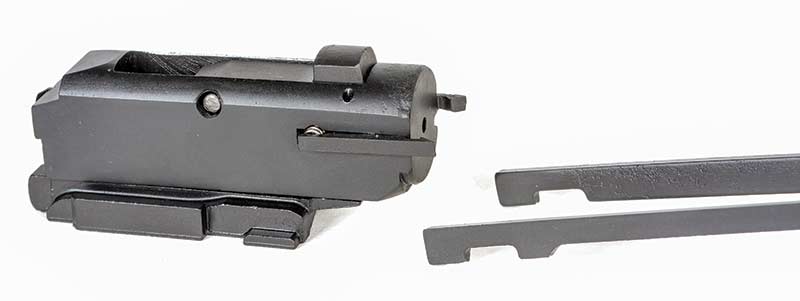
Unlike most popular shotgun card systems, the Vang system still
uses a removable aluminum backing plate mounted to the
receiver through an extended ejector screw.
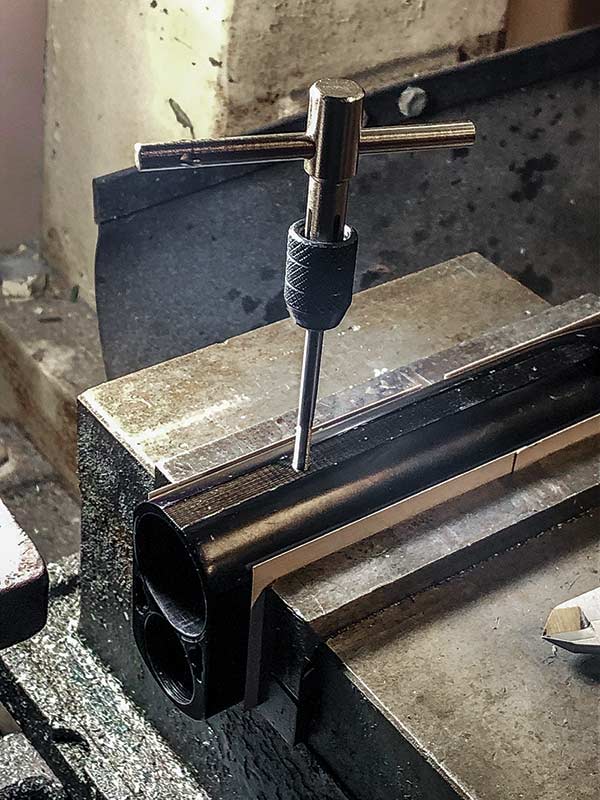
Rear Sight Installation
Rear sight installation is somewhat simpler, consisting of drilling and tapping holes for four #8-40 screws. These holes come on current Mossberg shotguns but as mine was made around 30 years ago, I had to add them. I spotted the holes in my mill with a carbide 3/32 ball-end mill, which I promptly broke off in the second hole and got to spend a couple of hours grinding out with a diamond-tipped Dremel cutter. You can use a drill press or even do it carefully by hand but if there is a more precise option, use it.
Finishing Touches
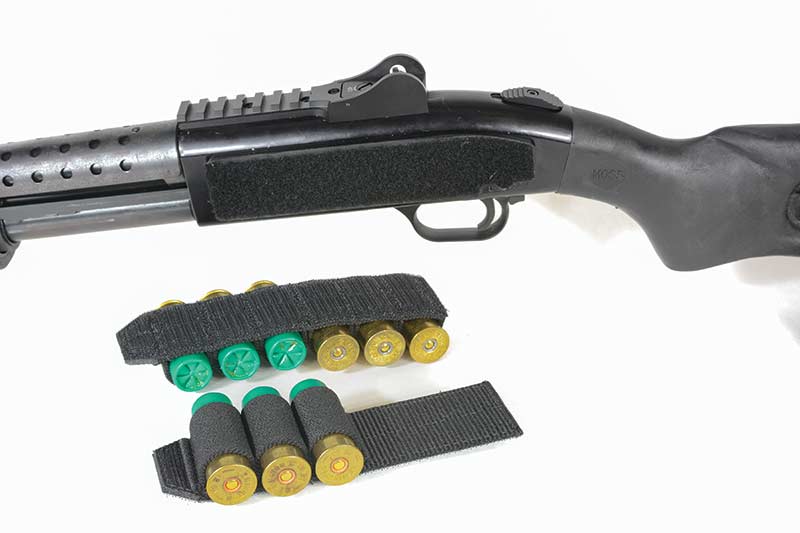
The final improvements were the Vang Comp’s stainless follower, oversized safety and Detachable Side Ammunition Carrier kit. Velcro-attached shotgun cards have increasingly replaced the hard plastic sidesaddles of yore and for good reason — it may take a little longer to load one, but once they’re empty, strip it off the gun and slap on another.
Unlike the common adhesive strip stuck to the side of the receiver, the Vang system uses Velcro on an aluminum plate mounted to the receiver. Although less critical on the aluminum Mossberg receiver, the ability to remove the plate keeps moisture from gathering behind it and rusting the receiver.
The plate installs on the 500/590 via a longer, threaded trigger housing pin and a modified ejector screw. Installation is dead simple and can be done without disassembling the gun. As for durability, the first one they sent out into the world is still in service on a duty gun.
This one should last for at least as long as it took me to clean this gun the first time — a mistake I won’t make again.