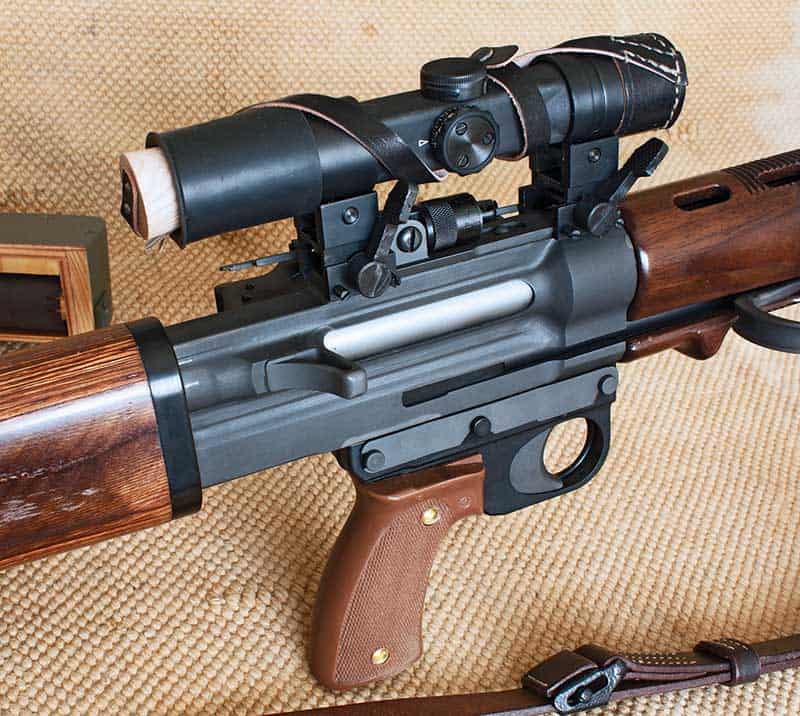
Brownells’ Shim Kit & Wheeler Laser Boresighter
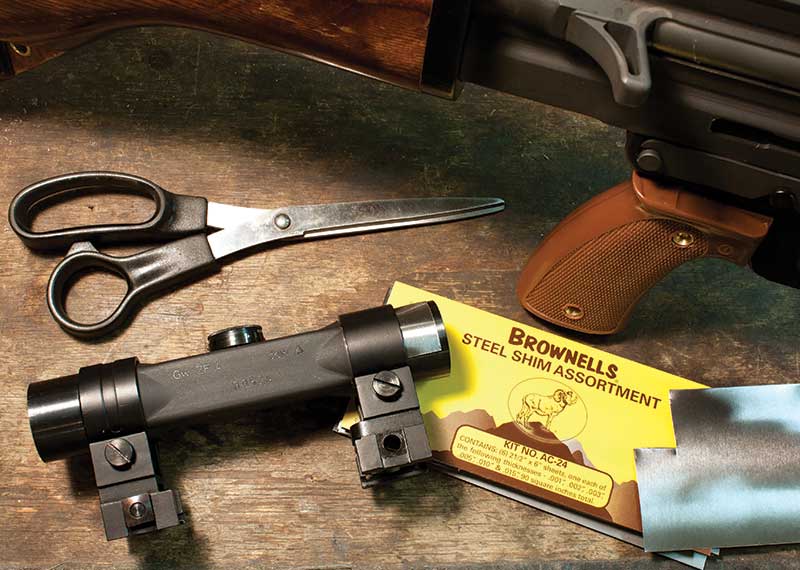
The Brownells Shim Kit offers an inexpensive way to fine tune elevation or
windage in scope rings or bases. In this case, the Meopta ZF4 reproduction
needed shims to align the windage properly on the SMG Guns FG42. Note the
first of two shims has been started under the rear ring.

The Wheeler Professional Boresighter is an important part of this equation, since the initial scope adjustment has no click values.
t’s always a sickening feeling to get a gun all up and running to find one component—a critical one—out of whack. When it comes to reproductions (especially faithful ones), you have to take the Old World charm warts and all, such as arose trying to fit Meopta’s reproduction WWII ZF4 scope atop the SMG Guns FG42 using repros of the original quick-detach rings. The originals were fitted and sighted by armorers who often numbered the scope/rings to the rifle.
In this case, the windage was off far enough that the small amount of adjustment the scope possessed couldn’t compensate. The ring maker confirmed the rings aligned on his rifle, and the scope base had been factory aligned before being riveted and welded.
There was no easy fix. Removing the scope base is a major affair, since it included welds, rivets and complete refinishing. I’d be out of the rifle for an extended period of time, too. Since it shoots well, such major surgery was not appealing. So I thought I’d try a simple solution first. Brownells offers a steel shim kit with sheets measuring 2-1/2 x 6 inches in thicknesses of 0.001, 0.002, 0.003, 0.005, 0.010, 0.015 inch for $19.99. A more expensive kit offers even finer increments, but this one proved good enough for me.
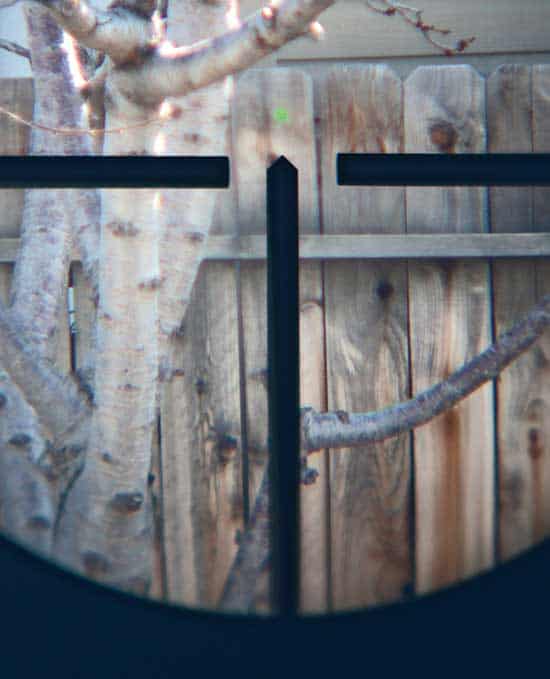
The boresighter now shows the windage is aligned. Next, the elevation turret cap will be disassembled (removal of three screws and lifting the cap) for adjustment.
The ZF4 scope is designed to be zeroed by the armorer who fits the scope. The adjusting screw is beneath the caps of both windage (top) and elevation (side), held by 3 very fine screws. Once zeroed, the scope can be click adjusted by the soldier, but the initial adjustment requires some method of boresighting.
My sight correction formula said a 0.015-inch shim should correct the problem. The pieces of shim (one for each ring placed on opposing sides) were cut with scissors, and 0.015 sheet was about the upper end of my scissor’s cutting ability. I placed the cut shim on a steel rule and used the shaft of the Brownells Magna-Tip screwdriver to iron out the slightly raised edge caused by the scissors at the cut, cleaned up further with a file. I gently hammered the shim around a 3/4-inch dowel to start the curve.
It wasn’t enough. I had to add two 0.005-inch pieces to both 0.015 pieces, and even then used up all the scope’s adjustment in zeroing. I won’t bore you with the effort involved in putting the rings back together, but it took plenty of patience to get the ring’s QD levers timed again while trying to keep the reticle level. Believe me, after this, I have nothing but praise for today’s modern scopes and mounts!
Necessary for the success of this operation was the Wheeler Professional Laser Boresighter. These early scopes don’t have click adjustments like modern ones. Here, math won’t help adjust the point-of-impact. Adjustment requires removal of 3 small screws in the turrets to access a screw to adjust zero with no point of reference. This wasn’t an operation I relished doing at the range, and the laser boresighter verified the need to install the additional 0.005-inch shim to complete the job before going to the range.
The Wheeler Boresighter is magnetic and attaches to the muzzle. According to Wheeler, it is not sensitive to its position on the muzzle, and I found that to be true, having taken it on and off so many times. I removed the muzzlebrake (since it may not be square like the barrel’s crown), attached the boresighter and checked the double-checked unloaded rifle in my backyard at 28 yards to fine tune the zero. The green dot was easy to see against my shaded fence at 28 yards.
The Wheeler Boresighter makes modern jobs much easier, too, since you can get the scope on paper without firing a shot. The boresighter works on one CR123A battery and emits a red laser or a green laser. It works best in shade, but I found even the green wasn’t visible at 25 yards in open sunlight (not surprising). The red laser is $124.99 and the green is $174.99.
Brownellswww.brownells.com
(Battenfeld Technologies)
www.btibrands.com