DIY: Adapting The
Streamlight TL Racker
You Only Got A 20? No Problem!
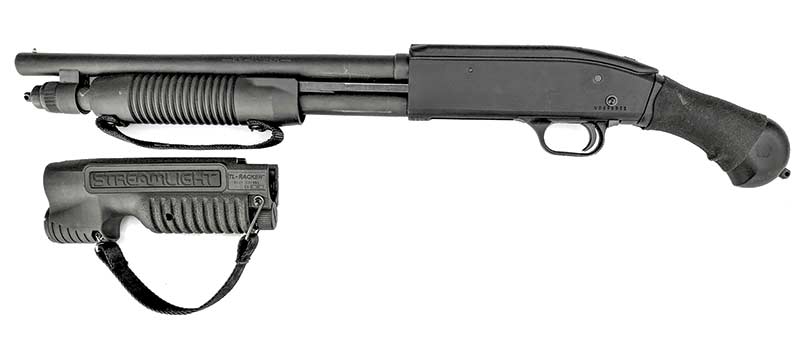
The Streamlight TL Racker is your best choice for a slide-mounted
tactical light on a short-barreled shotgun like the Mossberg 590 Shockwave.
Since I first handled the Streamlight TL Racker shotgun tactical light, I’ve been convinced it is the best on the market for short-barreled shotguns. The molded hand stop is virtually foolproof, which is exactly what I want when my fingers are just a couple of inches behind the muzzle. I also love the ambidextrous, full-length light activation panels, the awesome light output (1,000 lumens) and range (283 meters), the IPX7 waterproof rating and the high-quality construction. It’s a heck of a lot of product for $125.
When it comes to close-range firepower, a shotgun’s ability to deliver ounces of lead to the target is fairly awe-inspiring. The handy Mossberg 590 Shockwave makes the shotgun’s defensive firepower a lot more portable — it is one of the easiest shotguns to bring to bear if you are in a vehicle.
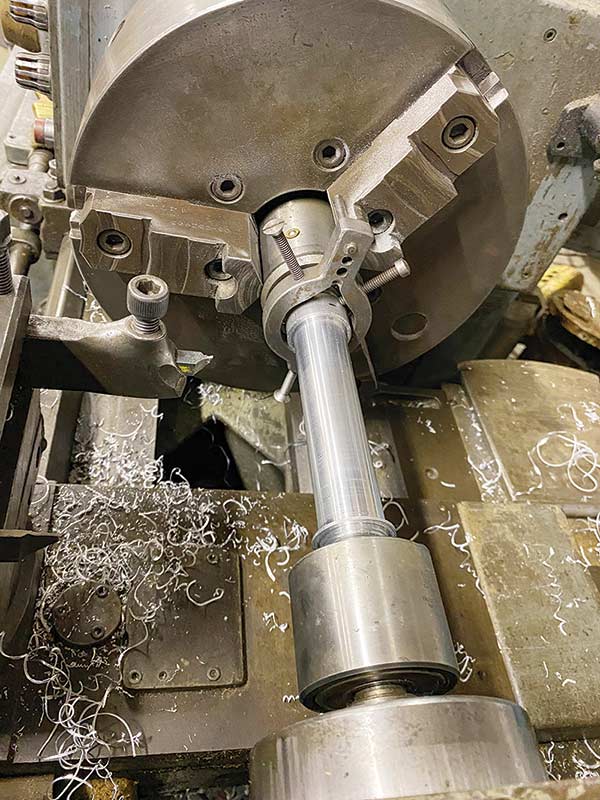
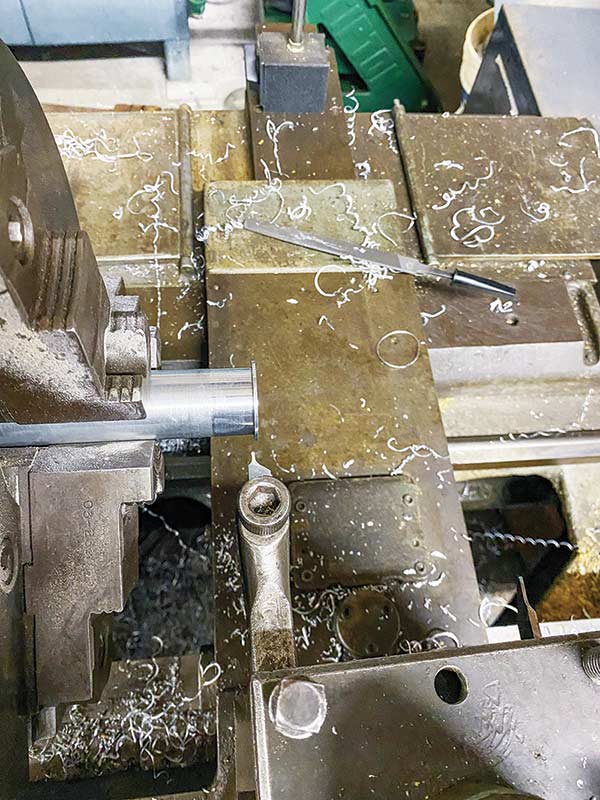
The first cuts had the tube installed in the lathe between
centers to make the lug and reduce the rest of the tube to 1.20" OD.
Dimensional Differences
Pairing the TL Racker with my 20-gauge Shockwave, I had every expectation it would prove itself to be one of the all-time great combos right alongside bacon and eggs. I got a 20-gauge because it would be easier for my wife to shoot. Unfortunately, I soon discovered the TL Racker only fits 12-gauge models! This became apparent after about five shots when the whole unit slid forward toward the muzzle. While installing it, I thought the fit seemed a little loosey-goosey but in my experience, most pump-action slides are wiggly. I didn’t think too much of it until my supporting hand was even with the muzzle. Yikes!
Removing the slide grip from the 20-gauge 590, I measured both the opening through the plastic grip and the diameter of the metal sleeve it rides over. The sleeve was a uniform 1.00″ in diameter. The inside of the factory grip was from 0.047″ to 0.078″ larger. That’s not exactly tight, but it was tight enough to align the front of the grip with the round grip-retaining nut and secure the grip from moving forward under recoil or cycling.
By contrast, the inside diameter of the TL Racker was from 1.18″ to 1.24″. Rather than secure the light to the sleeve of the slide, the grip-retaining nut just centered it, allowing the TL Racker to gradually creep forward in use.
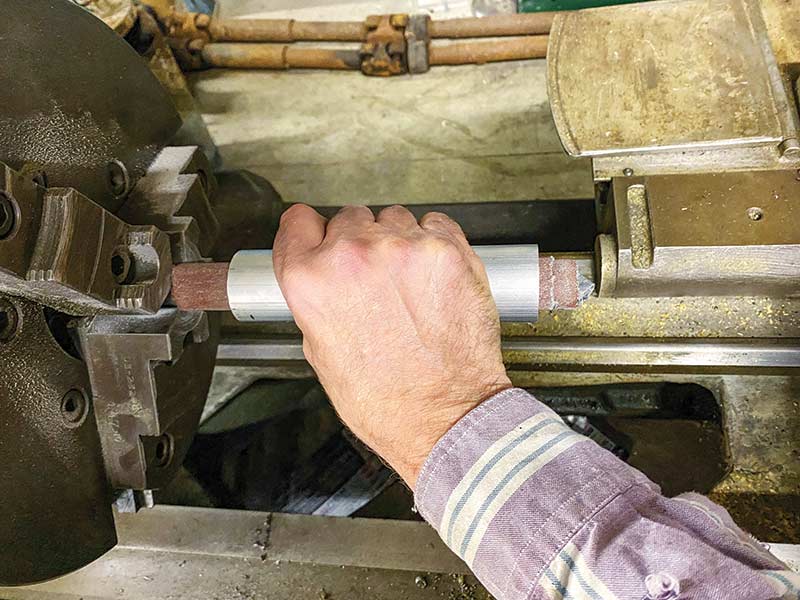
The first step was to hone out the tube ID a few thousandths to allow a snug sliding fit over the sleeve. Frank improvised a hone using a section of iron pipe with sandpaper taped to it.
Solution Plan
I saw the solution as a tubular spacer to fill the approximately 0.20″ gap around the slide sleeve, mechanically secured to the TL Racker in the rear and to the sleeve itself in the front with a large washer beneath the factory grip-retaining nut.
There might be easier ways to adapt the Streamlight TL Racker, but I don’t care for duct-tape fixes where personal safety is at risk. This method requires a lathe but it is pretty novice lathe work and less than an hour of it at that. I took careful measurements to sketch a blueprint for the spacer and planned out the order to make my cuts with the fewest changes in set up.
The starting point for my spacer was a 6″ piece of 0.25″ thick wall 6061 aluminum tubing with a 1.5″ OD and a 1″ ID ordered from McMaster.com for less than $23, including shipping costs (Part number: 9056-K27).

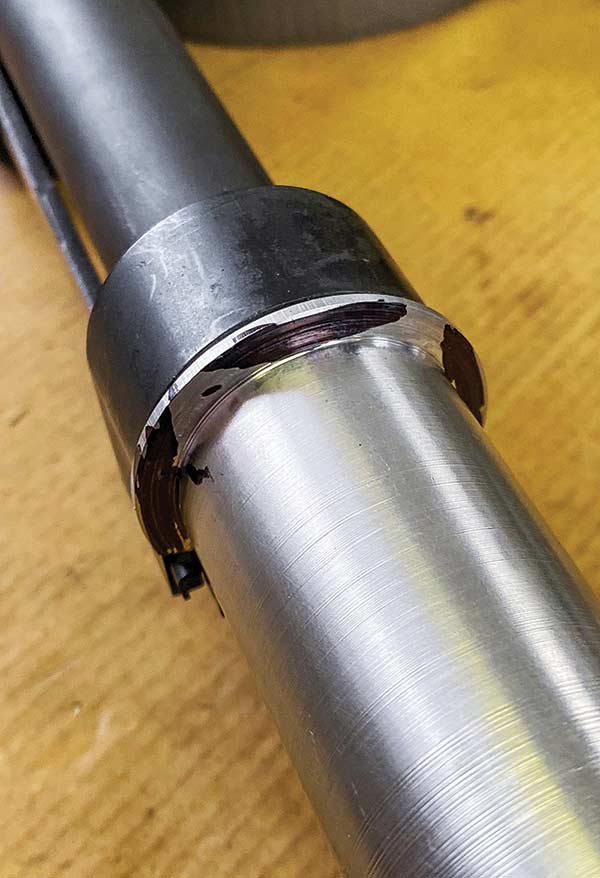
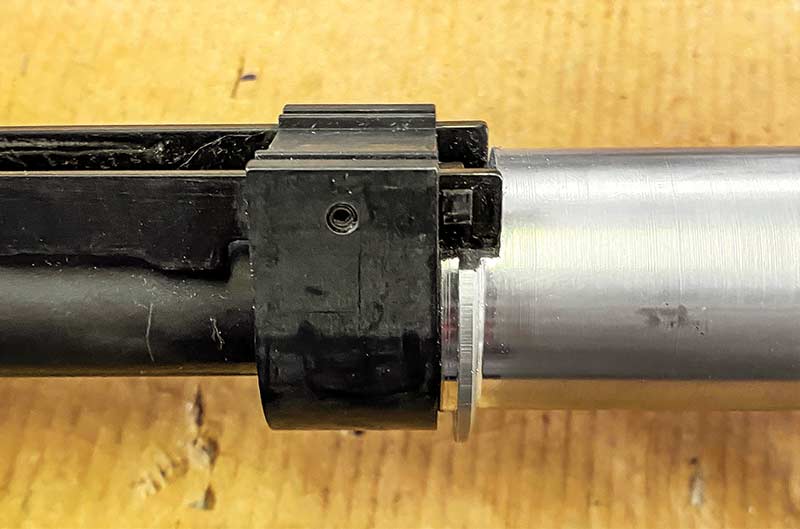
This shows how loose the TL Racker is on the 20-gauge Shockwave
slide sleeve. It will simply slip off the front in use … and that’s no good!
Initial Tube Fitting
The first step was to fit the tube over the slide sleeve. You can’t get a 1.00″ tube over a 1.00″ bar without a press, so I taped two lengths of emery cloth to a length of iron pipe chucked into the jaws of my lathe to improvise a hone to open up the ID of the aluminum tube. I stroked the tube back and forth over the hone until I removed just enough material from the ID for a snug sliding fit on the sleeve. With no honing oil and the overly fine emery cloth I had handy, this took about 350 strokes at 375 rpm — about 10 minutes. It could have gone a lot faster, but not so much faster to be worth my time searching around the shop for coarser paper.
The next step was to chuck the tube up between centers in the lathe. For this to work, the ends of the tubes needed to be cut square. I checked them with a machinist’s square, and they appeared perfect. What a nice surprise! I had a lathe dog just the right size for this project and installed it on what would be the front end of the finished spacer.
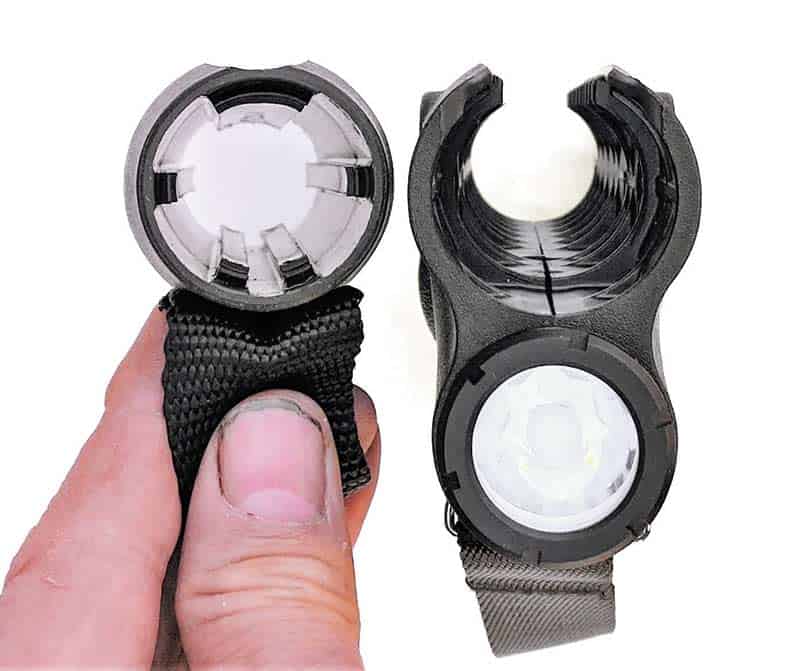
Note how much tighter the ID of the factory 20-ga. grip (left) is compared to the factory TL Racker grip (right).
Tube Fitting
I planned to first cut the rear of the spacer and include a lug on the bottom to engage the molded ribs inside the TL Racker’s plastic body. The lug was located about 0.082″ ahead of the rear of the tube, which rested against the face of the boss where the slide bars were mounted. The first cut I made was the rearmost, turning the OD down to 1.2″ along the last 0.082″ of the tube. Then I drew back the cutter, moved it another 0.077″ along the length of the tube to clear the material I would need to form my lugs and took the rest of the tube down to 1.2″ OD in several passes. Aluminum cuts very easily.
For the next cuts, the centers weren’t needed. The lathe dog was removed from the tube, which I flipped over and gripped in the chuck with the uncut portion sticking out close to the chuck jaws. The only portion of the tube still needing the OD turned down was the portion previously under the lathe dog. From this material, I also intended to cut a 0.075″-thick washer. Both the washer and the front 0.25″ portion of the tube needed their ID opened up to 1.10″ to clear the bottom of the grip-retaining nut. This was the next cut to make.
With the ID now 1.10″ on the front of the tube, I turned the OD to 1.47″ for the thickness of my future washer and then cut the rest of the excess behind it down to match the 1.20″ OD I cut on the rear portion in the first set up. Then I used a parting tool to cut my washer off the tube. I deburred the inside edges of the relieved portion of the tube with some emery cloth so they wouldn’t hang up on the sleeve. Now I was ready to fit the sleeve to the slide and grip.
A small portion of the top rear of the tube needed to be cut away to clear the ends of the action bars on the top of the boss at the rear of the slide sleeve. I marked this with a Sharpie by eye and cut away most of the material in a milling vise on the drill press. The final cutting was done with files. Aluminum is so soft it wouldn’t have been much more trouble to file the whole thing, but the milling vise does help to keep the cut level.
A lathe dog is used to tie the part to the turning lathe head
when it is between centers. Without it, the part would likely
stop turning as soon as the cutter came in contact with it.
The next step is to shape the lugs. The parts inked
with black marker need to be removed.
Once the right amount of metal is removed from the top
of the tube, the rear of it should sit right up against the
face of the action bar boss on the slide sleeve.
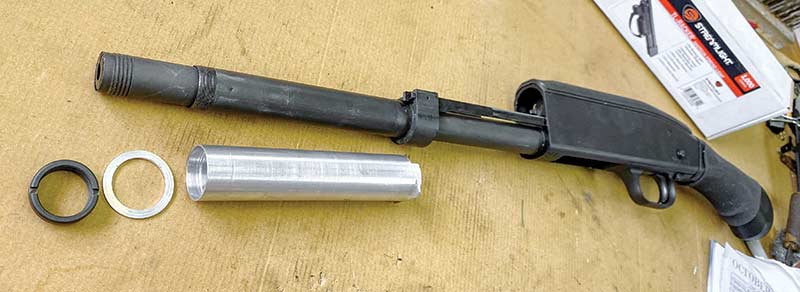
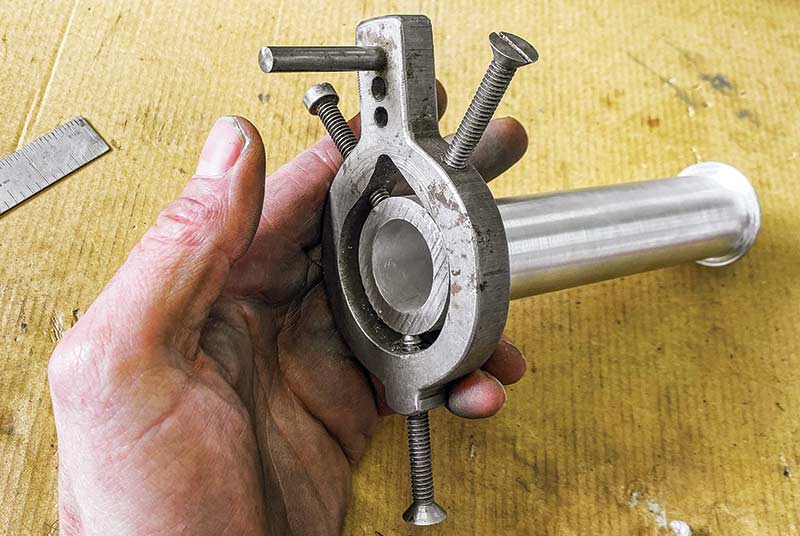
Grip-retaining nut, washer and tube ready to install.
The disc at the other end of the tube is the future washer
that will hold the front of the tube tightly in the TL Racker grip.
Installation
To form the lugs to engage the last groove molded inside of the TL Racker grip, I installed the tube over the sleeve and marked the areas to be removed with a Sharpie pen. This isn’t a high-precision operation. A calibrated eyeball is more than adequate. The lugs are on the right and left bottom corners only; everything else is sanded and filed away smooth with the tube OD. With the rear of the tube fitted flush with the action bar boss on the sleeve, and the bottom lugs formed, I test-fit the tube on the sleeve and then installed it in the TL Racker and checked it against the interior ribs. To install the tube in the molded plastic TL Racker grip, I removed all the screws on the right side to allow the two-part grip to flex open a little more. It allowed me to open up the inside just enough to rotate the lugs into the molded slot by turning the tube with a pair of pliers from the front.
It turned out I needed to make one last cut on the lathe off the front end to shorten the overall length by about 0.125″, making the total length of the tube 5.74″. This reduction got the front of the tube flush with the front edge of the front molded rib inside the grip. The washer, when placed over the end of the sleeve, would sit flat on the front face of the tube and the plastic rib with no forward or back wiggle room.
After installing the tube spacer in the grip, all the screws were reinstalled, the assembly was mounted on the sleeve and the washer and grip-retaining nut were put in place. The rebated back side of the grip-retaining nut slips inside the rebated area at the front of the aluminum spacer tube. A spanner can be made for tightening the mounting nut using an old deep socket with the end ground and filed to match the two slots in the nut. Lacking a sacrificial socket, you can get it pretty tight with the tip of an ordinary flat-point screwdriver.
With this rugged adapter, I now have complete confidence my TL Racker will not budge even if the nut does come loose. In a self-defense gun, complete confidence is the thing you want.