DIY Stocks With SK Grips
The easiest and most noticeable way to change the personality of your shooter is by giving it some custom stocks. Sure, there’s plenty of good grip makers out there, but how about doing it yourself? Why? For one thing, it’s a lot cheaper. I’m not knocking the stock makers out there, not at all. It’s tedious, hard work to perfectly fit stocks to your grip-frame the way they do — and worth every penny they charge.
But doing something yourself gives you pride and satisfaction for a job well-done. It makes the gun feel more your own after doing a project like this. Don’t get discouraged if your first set or two aren’t perfect, they won’t be. But you’ll gain respect for those master stock makers, while learning a lot in the process.

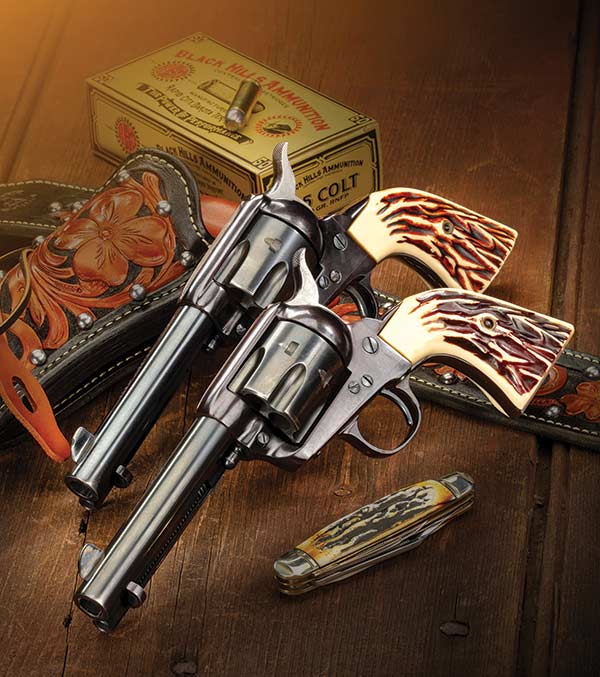
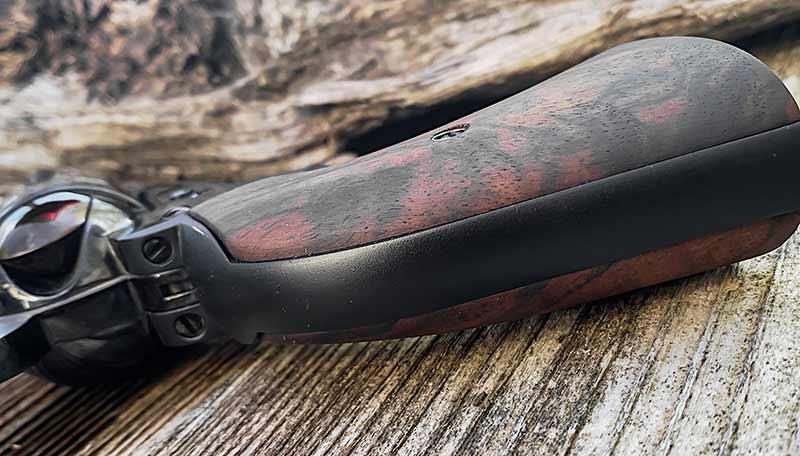
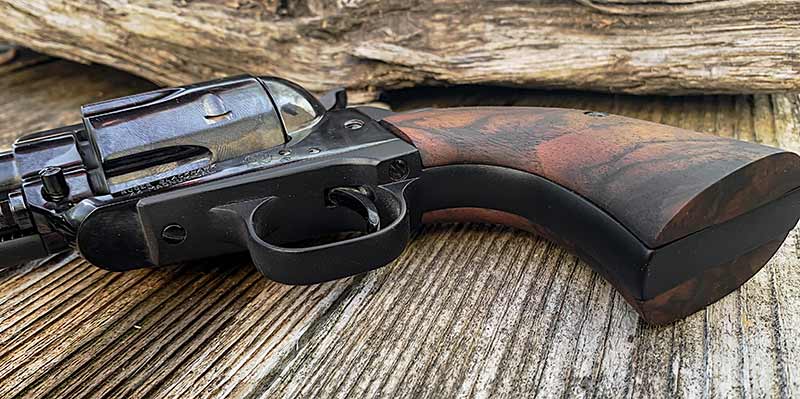
Tank’s Mag-na-port 4" custom by Ken Kelly needs some new stocks.
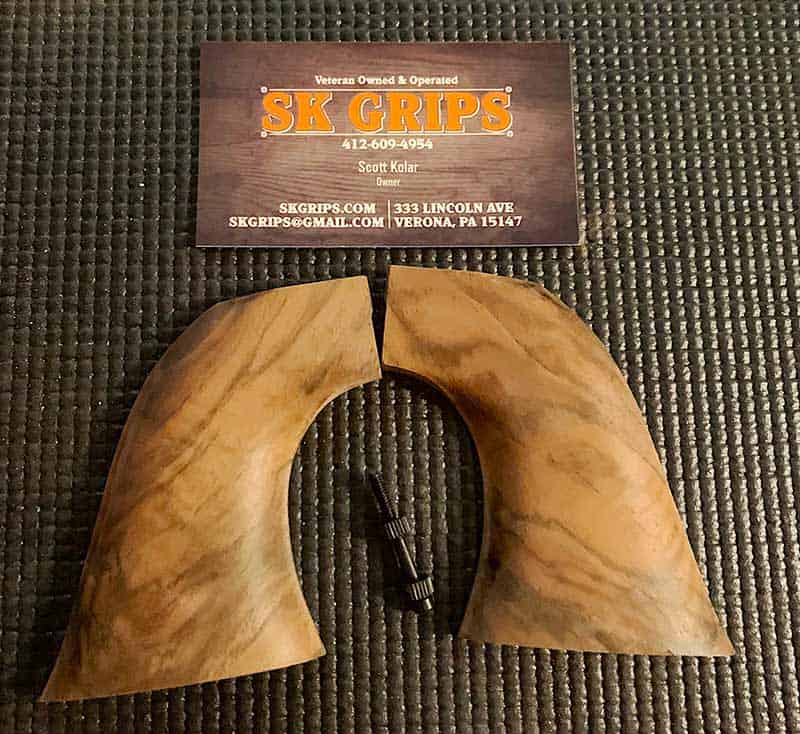
SK Custom Grips
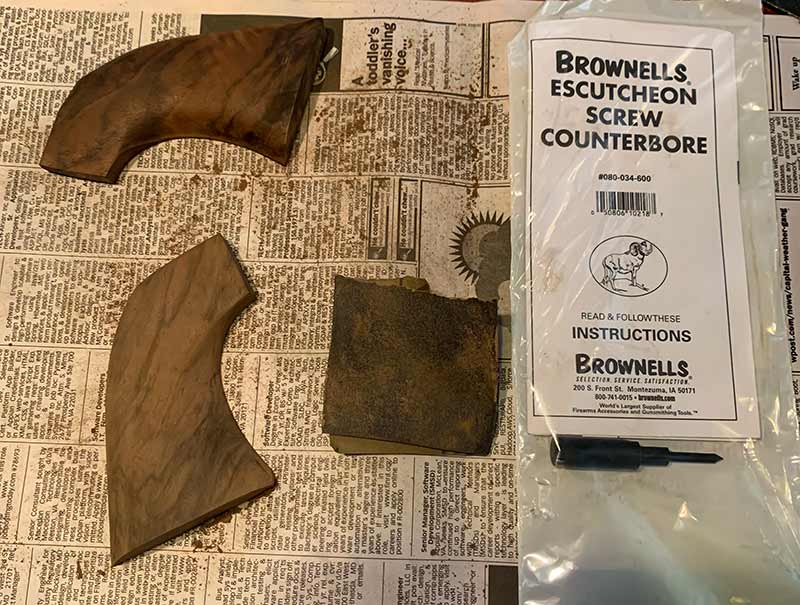
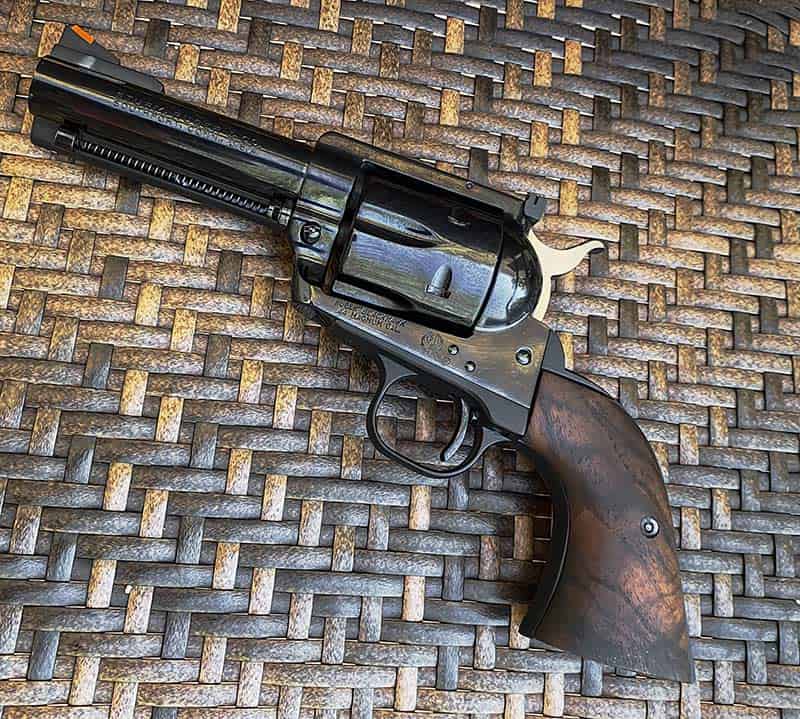
Scott Kolar, the head honcho at SK Custom Grips, offers DIY stock kits for Ruger Single-Actions, in either plow handle or Bisley-style shooters. He includes the escutcheon’s hardware, which is blued, for a traditional, vintage look. He also offers case-colored screws, depending on your taste. Blued hardware is impossible to find, and Scott has it specially made. He’s a great guy and will work with you, depending on any questions you have. He’ll even explain how to finish the stocks once you’re satisfied with your fitting of wood to metal.
The kits go for $99, including shipping, and Scott uses really nice exhibition grade French walnut, with lots of figure. The kits are a bargain for dressing up your favorite six-shooter.
I have a custom old model flattop that Ken Kelly of Mag-na-port built for me from an old, abused Ruger 6.5″ Flattop. Called Skeeterito, the 4″ Flattop is a favorite and was in dire need of some nice stocks. Scott was the man I turned to and decided to take you with me every step of the way.
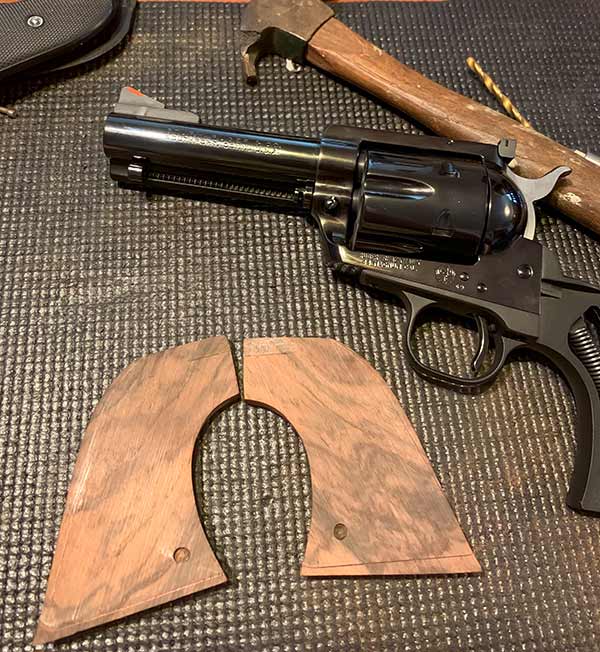
After removing the old stocks and locator pin, place the SK stock blank against your grip-frame and trace the outline.
Drill your locator pin holes after carefully marking them. Now we start sanding to the traced lines.
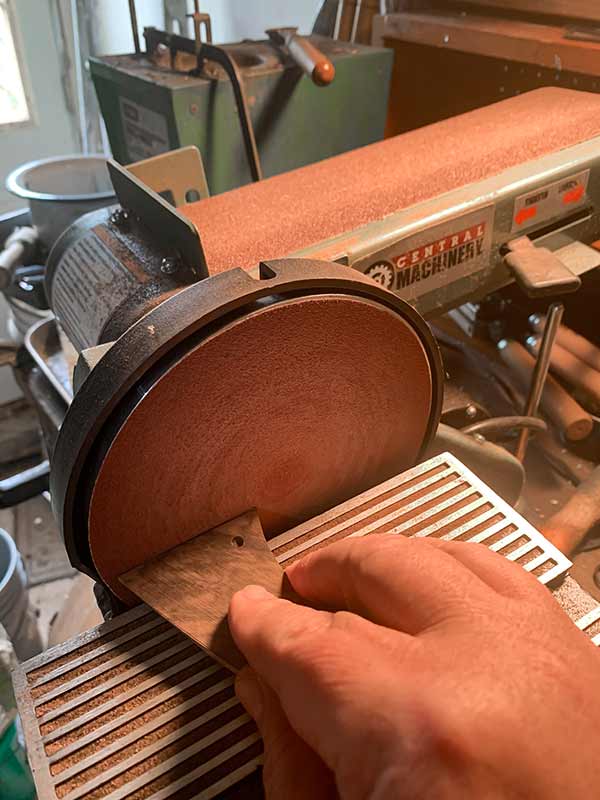
A belt/disc sander will be quicker initially to get us close to where we want to be.
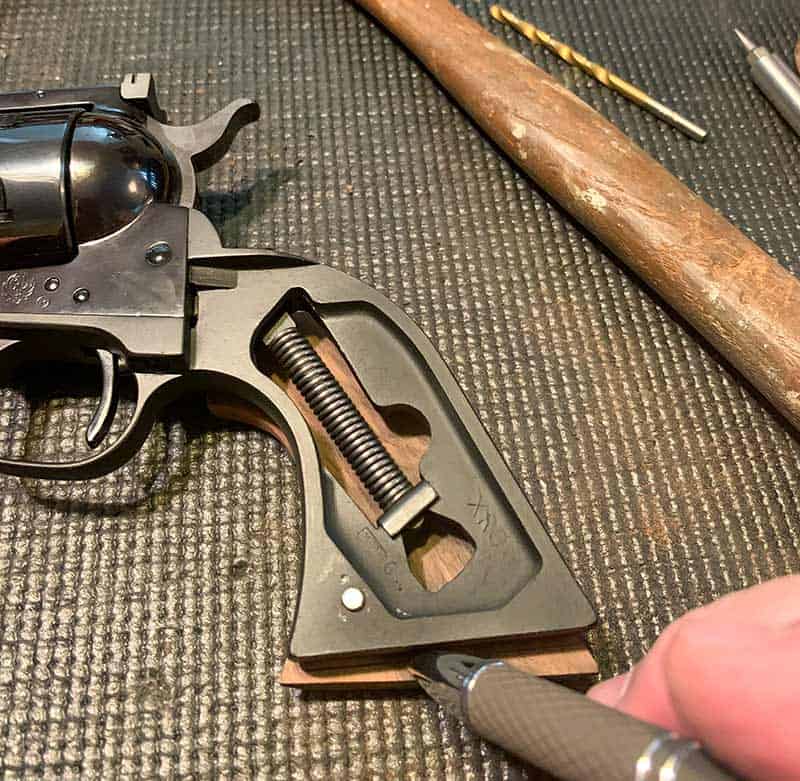
When you’re about 90% done, drill your escutcheon holes for your hardware and seat them below surface level.
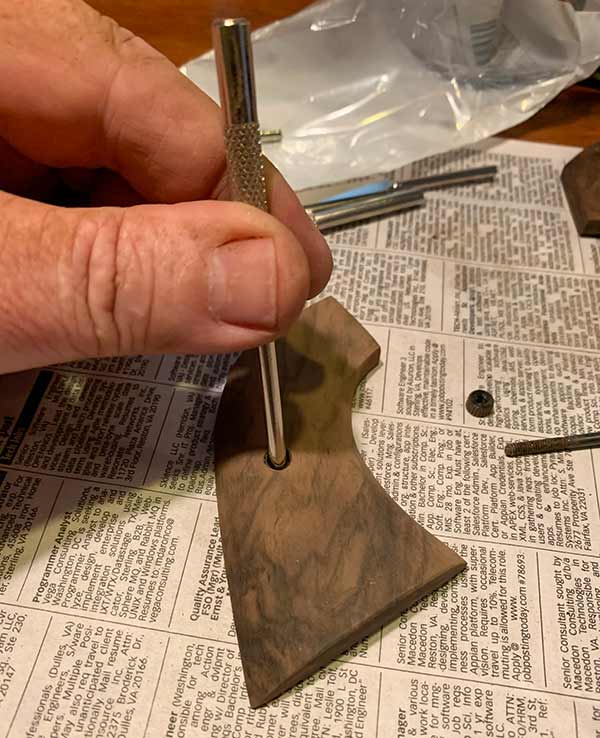
Using a punch makes seating escutcheon hardware easier.
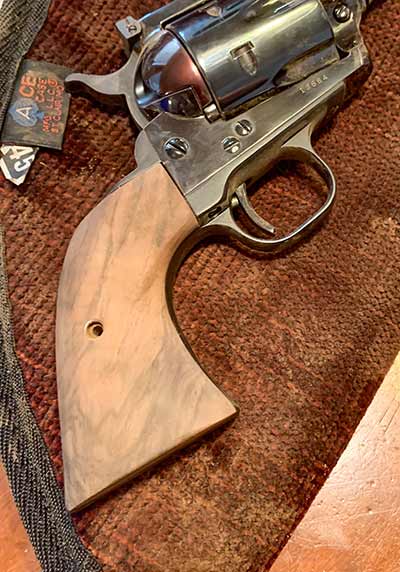
Continuous checking of fit is necessary for good results.

Gettin’ Started
Go ahead a grab yourself a big mug of coffee, turn on a western and get ready to vanish into the unknown. The Western will provide a soothing background, but after a bit, I guarantee you’ll never hear it, you’ll be concentrating so much.
Remove the old stocks and punch out your locator pin at the bottom of the grip-frame. Depending on how thin you want your stocks, you may actually shorten the pin. Grab one of your roughed out stocks and place it tightly in the square corner at the top of the grip-frame. Now mark where you will drill the locator hole. Don’t drill too deep, you risk sanding through the hole. Do the same with the other stock.
Now, replace the locator pin and fit your stocks to the grip-frame. Use a thin lead pencil and trace the outline of the frame to your wood stocks on both sides. This will be your rough cut, or sanding line. Scott does a good job getting them close, so there won’t be too much material to remove. However, a belt/disc sander with speed up the initial removal of wood. When you’re done sanding to the line you drew, start with your 220-grit sandpaper.
When you’re satisfied, you’ll know you’re done.

Final Sanding
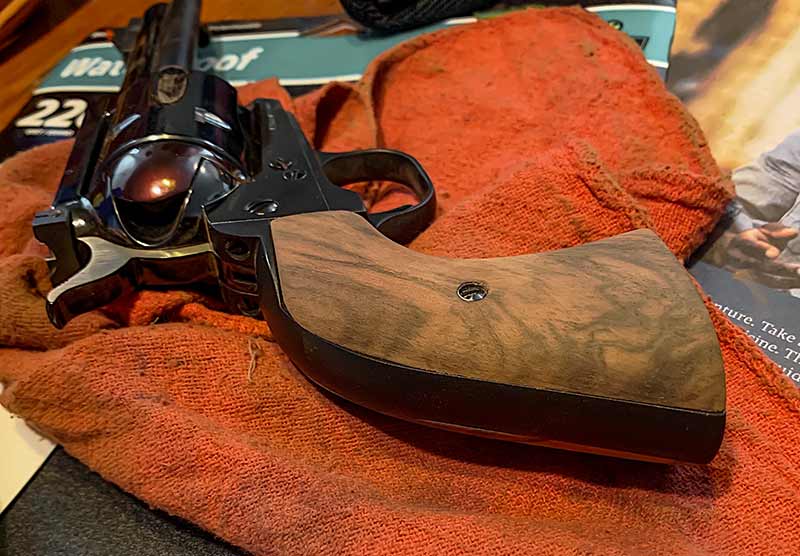
Sanding is a discipline of one of life’s greatest lessons — patience. It provides you the opportunity to reflect, as you slowly shape your stocks the way you want them to be. Don’t rush! Take your time, especially when you get close to the edges. Remember, be patient! Since my gun was blued, I would sand, check fit, sand some more, and repeat. You’ll do this hundreds of times.
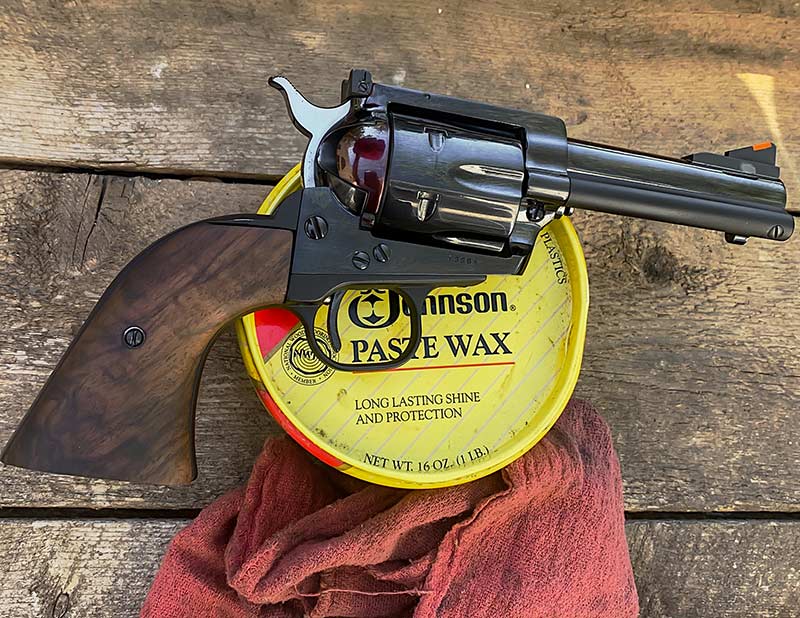
Take it slow, it’s not a race. When you start getting tired, or bored, stop! Put it away for another day. Start fresh and be patient. As you get closer, things will start popping with the fitted look. They’ll start looking like professionally fitted grips. When you think you’re done, break out your critical eye. Do a final wet sanding to fill the pores. I used Johnson paste wax for my finish and buffed them with a rag for a subdued look.
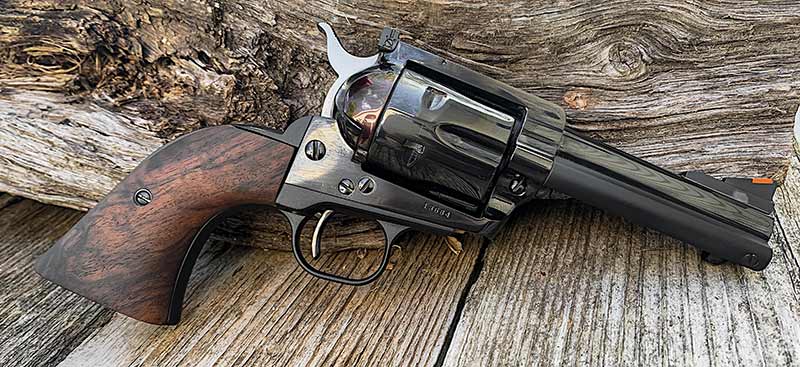
I think they turned out pretty good. They’re not perfect, but close enough for me. And in the end, that’s all that really matters …
RELATED ARTICLES

A Place for...
Fix It Sticks...